How to Create Masks with the Mask Designer
PowerDirector 17 features an intuitive Mask Designer, which includes new painting masks and brush-created masks for irregular shapes and objects. In this tutorial, we will show you how to create a brush mask using the new and improved Mask Designer.
Step1. Creating a Mask with Mask Designer
First, drag and drop a photo from the media room into the second track of your timeline (track 2.), and drag the background photo into the first track of the timeline (track 1).


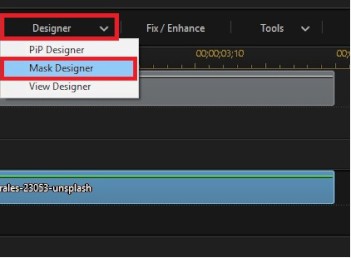
Next, select your photo and click on the Designer button at the center of your screen. Select Mask Designer to access the design interface.
In the Mask Designer, you have several templates to choose from. If you’d prefer to use your own shape, Mask Designer provides 3 options for you to create other mask styles:
 Create an image mask:You can load image and your footage will be reshaped accordingly.

 Create a text mask:Enter the text you’d like to appear in your photo. To adjust the font style, font size, etc. go to the left side of the panel under Font/Paragraph. To adjust the text mask itself, go to the preview window and resize on the left panel.

If you wish to add more text – click on the  at the top of the panel to add another text box.

 Create a brush mask:Using brush to create masks from scratch, especially for irregular mask.

You can use different tools to draw the customized mask and adjust the brush’s width, by using tracing paper transparency you can also preview the result of your mask.


If you want to make some effect of the mask, you can set the Keyframe of the Position, Scale, Opacity, Rotation, Freeform and 3D Depth etc.

All adjustment of the mask can be found in Properties after double click the photo.
When the Mask Designer editing is completed, click OK.

Get PowerDirector 365 Essential for Free
Take your videos to the next level with the best video editor for Windows PC


