How to Make an Engaging YouTube Intro
YouTubers watch a billion hours of video a day, but on average only watch around 50-60% of a video’s total length. If you are a YouTube content creator, this should tell you that the videos you create on your channel need to immediately stand out and draw in your viewers.
One of the best ways to grab a viewer’s attention is with an intro video. An intro video is the opening sequence of a YouTube video and usually lasts about 5 to 20 seconds. Effective intro videos quickly introduce you or your brand, raise anticipation for the content, and start to build brand recognition, all within the first 20 seconds of the video.
With PowerDirector you can make memorable intro videos for YouTube using the following features:
- Intro video templates (express projects)
- Motion Graphic Titles
- Particle Objects
- Transitions
- Background Music
Here is an example of a YouTube intro video made using these PowerDirector features:
In this article we will show you how to create the above YouTube intro video, and also share some great content you can use to make your own intro video. If you don’t have PowerDirector already, download it here for free.
Making an Intro Video
1. Use an Intro Video Template
PowerDirector includes dozens of intro video templates (called express projects in the program) that you can use to get started. To use an express project:
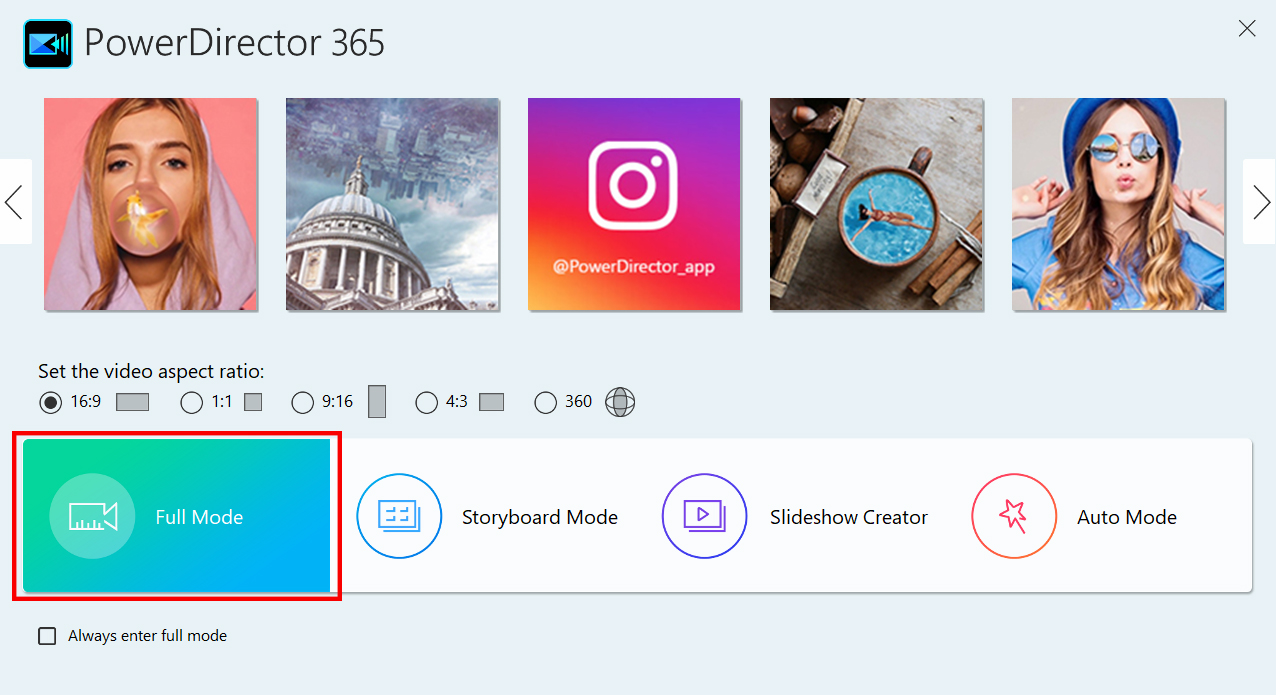
1. Launch PowerDirector 365 and then select Full Mode.
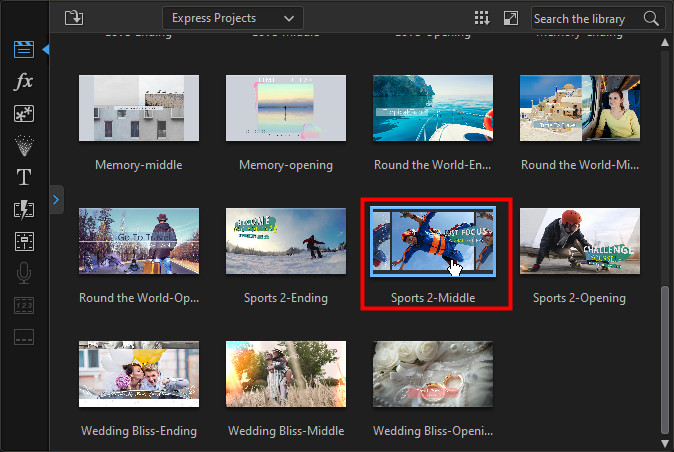
2. Click the  button and then select Express Projects.

3. Select one of the express project templates to use in your intro video. We used Sports 2 - Middle in our example intro video. This express project is available in the PowerDirector Content Pack Premium 3.
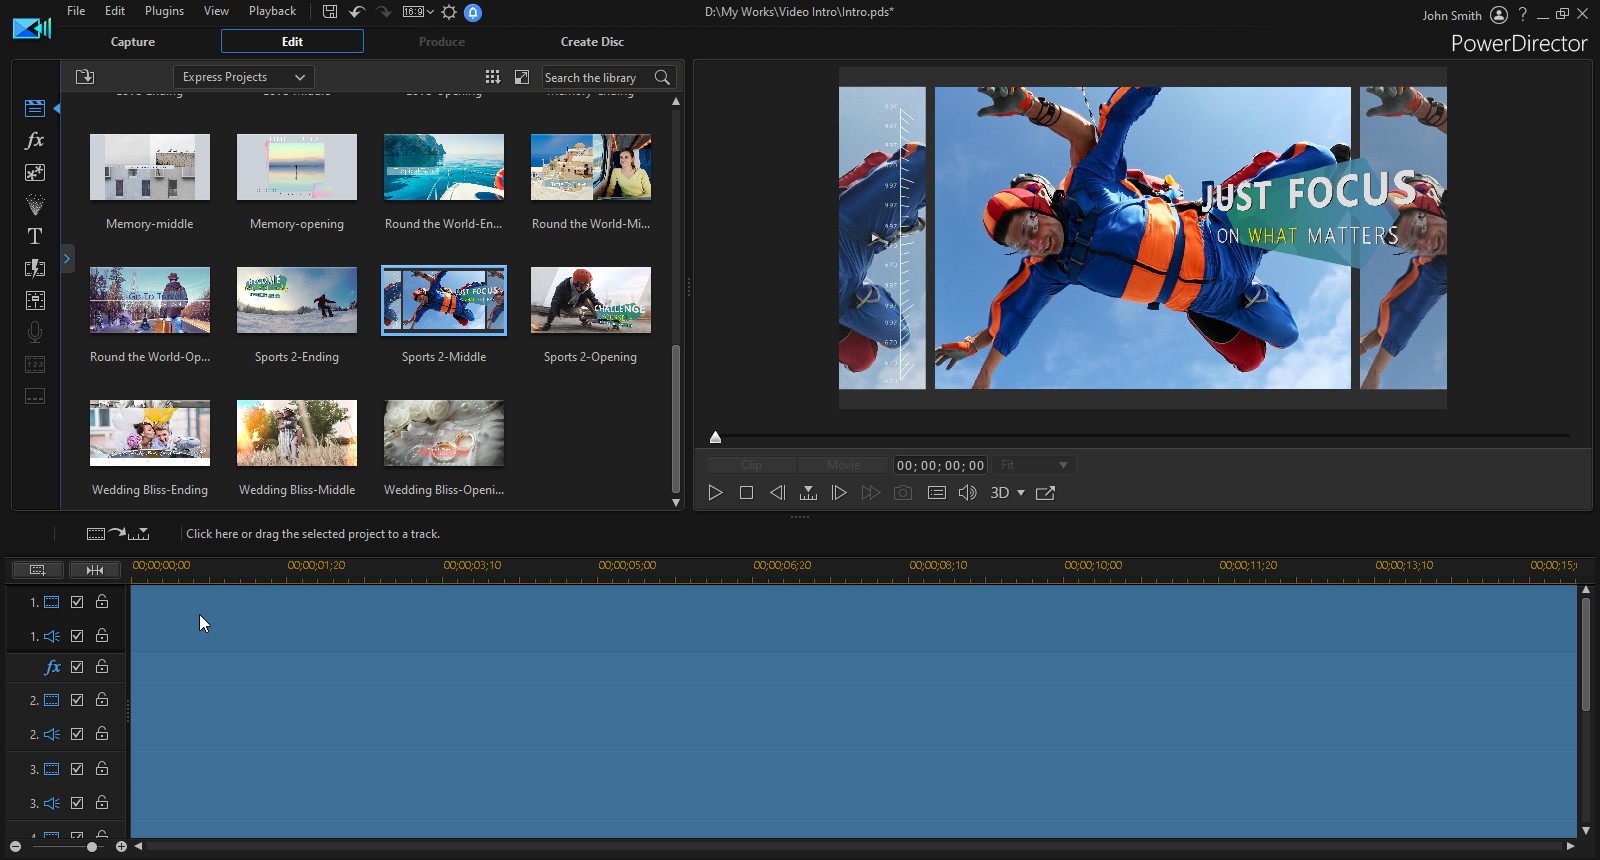
4. Drag the express project to the video timeline.
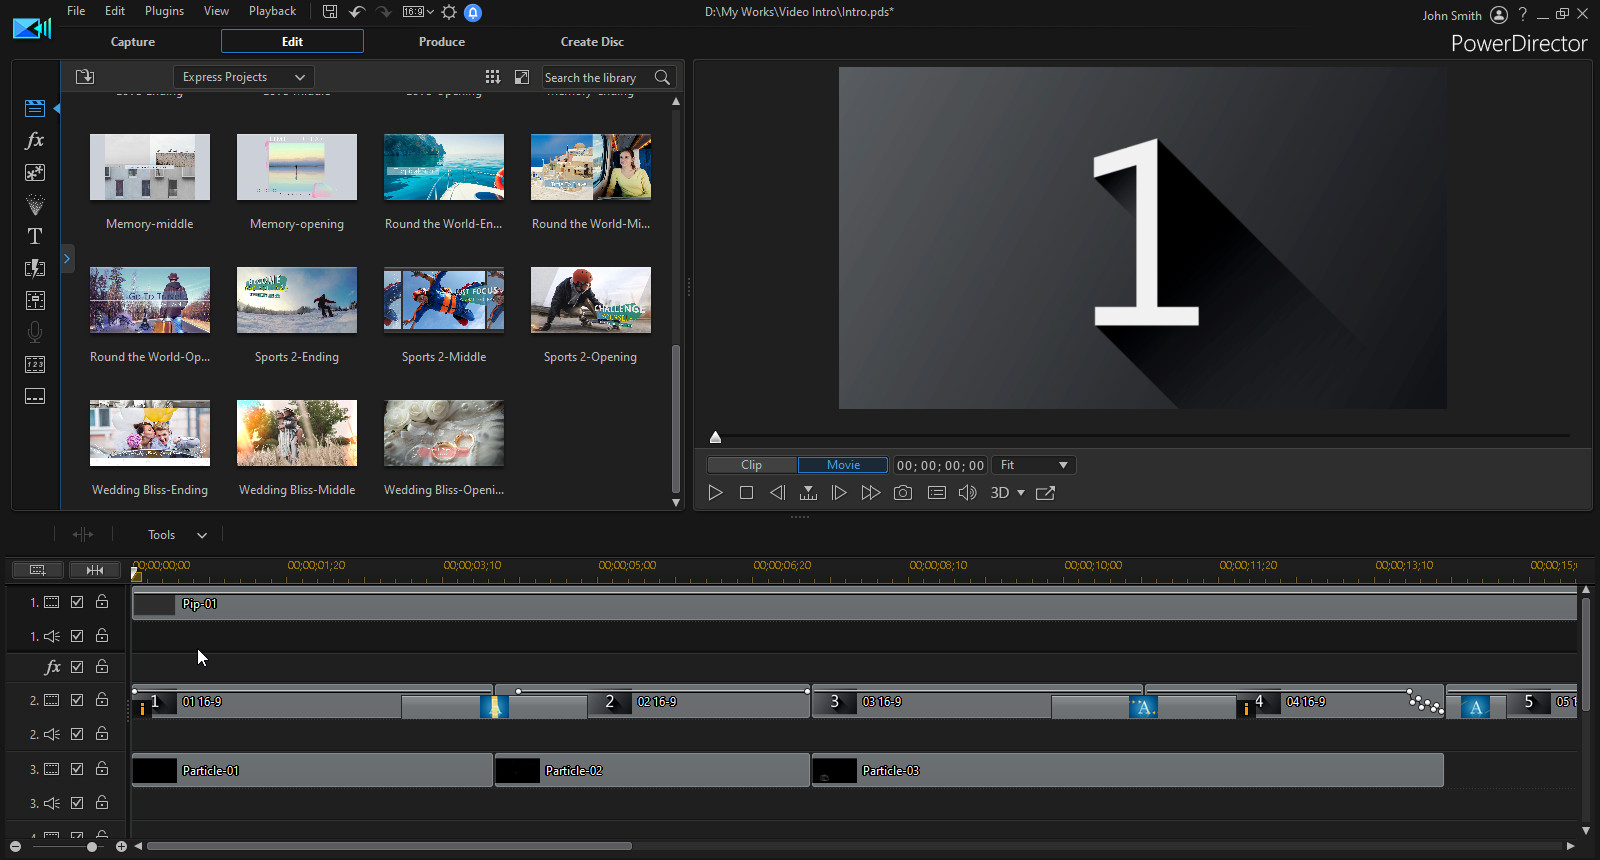
5. Once the express project is in the timeline, take some time to watch the intro video template example and decide how you want to incorporate your own media. When ready, replace the media placeholders with your own media, i.e. video clips of you or from your YouTube channel.
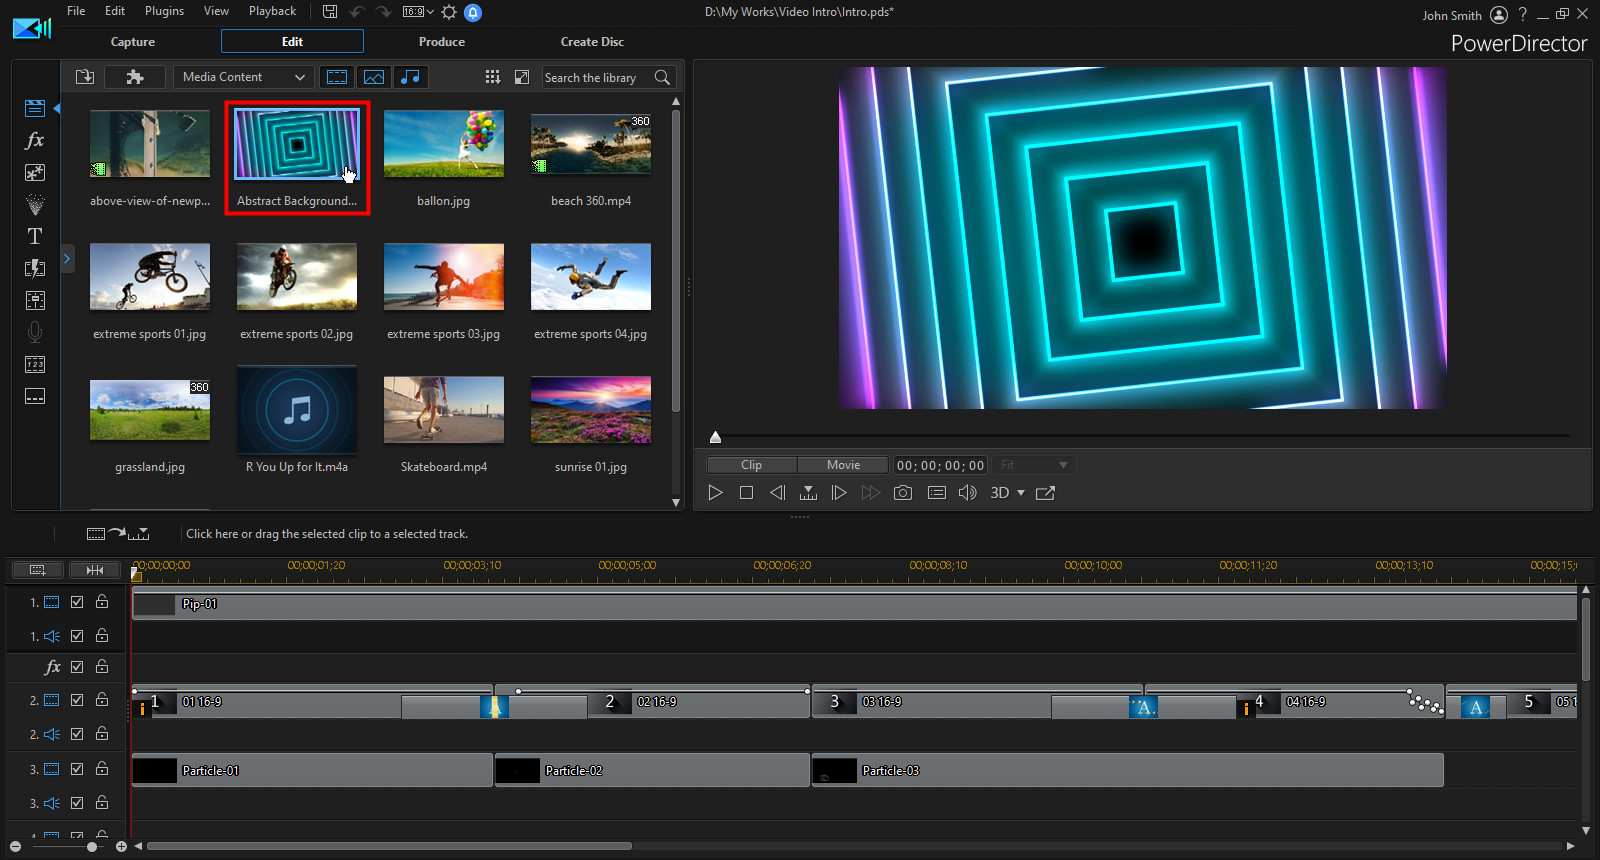
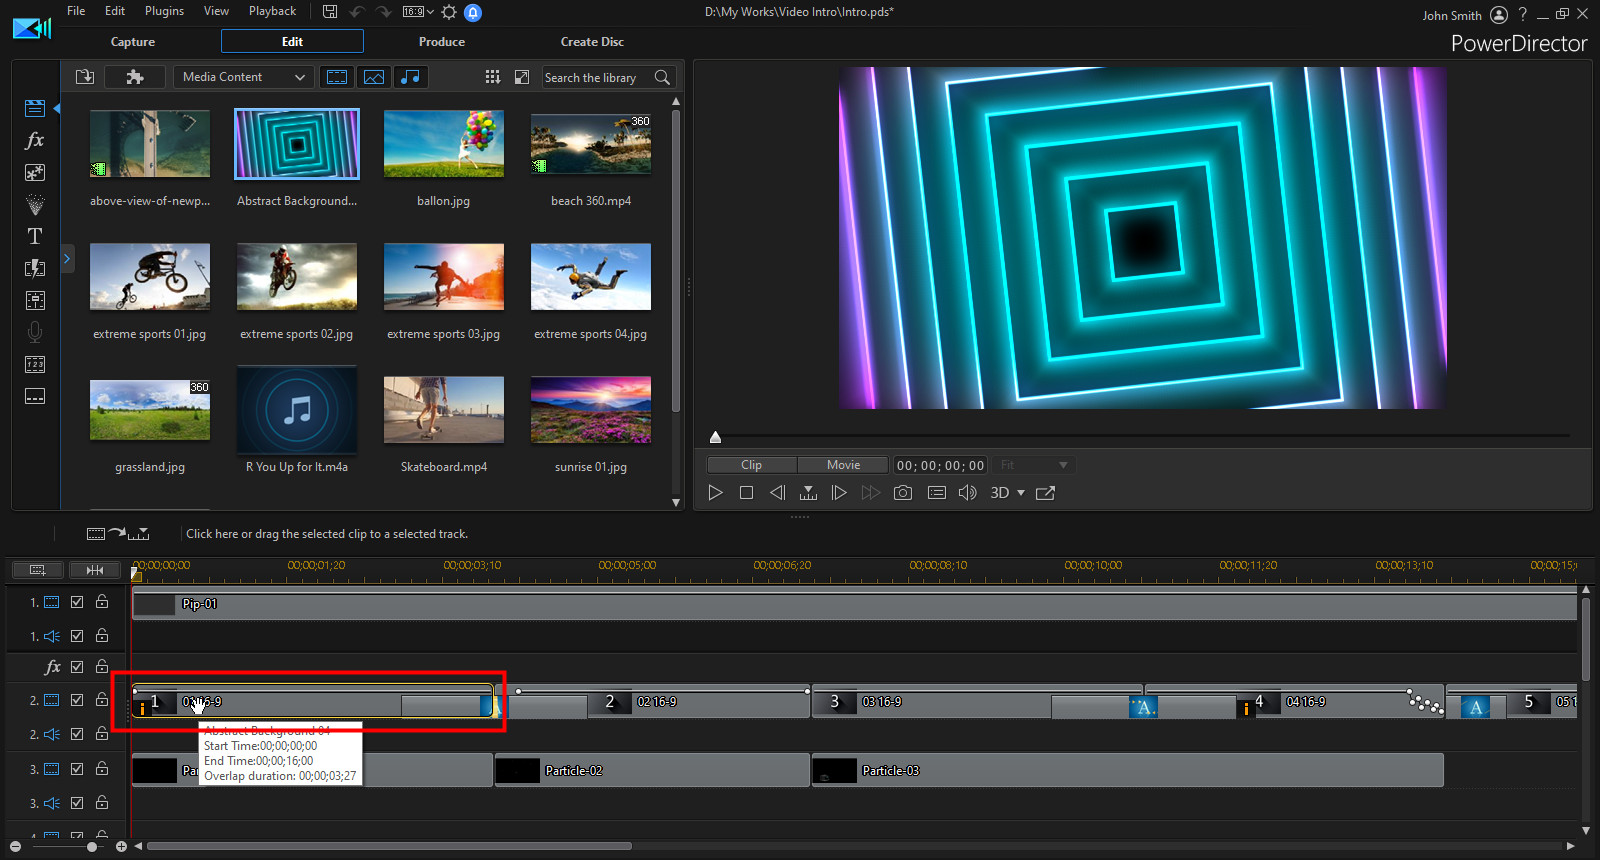
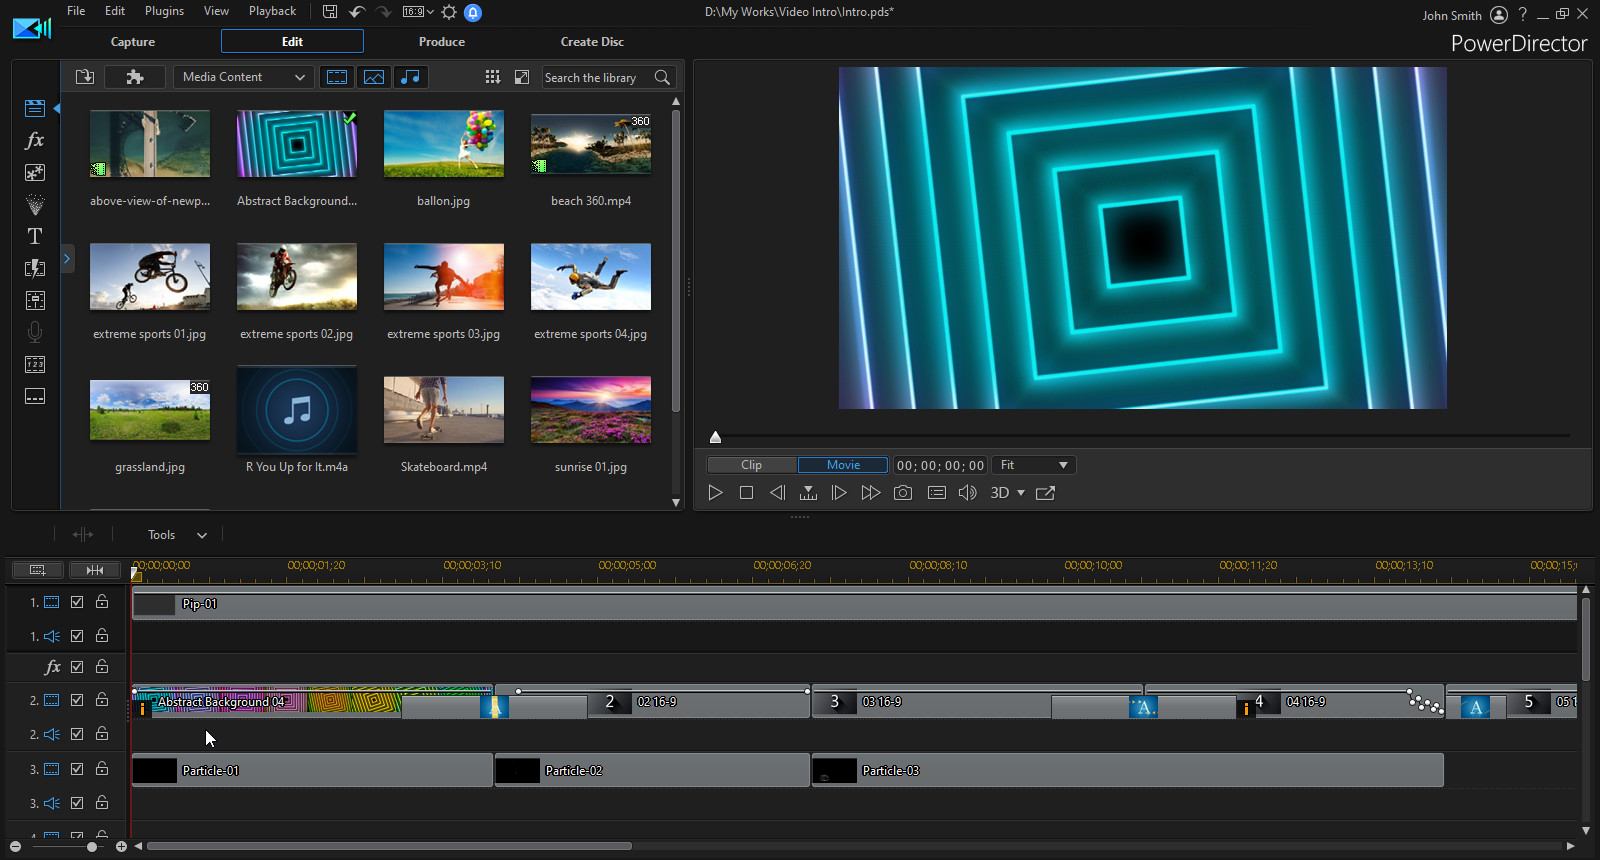
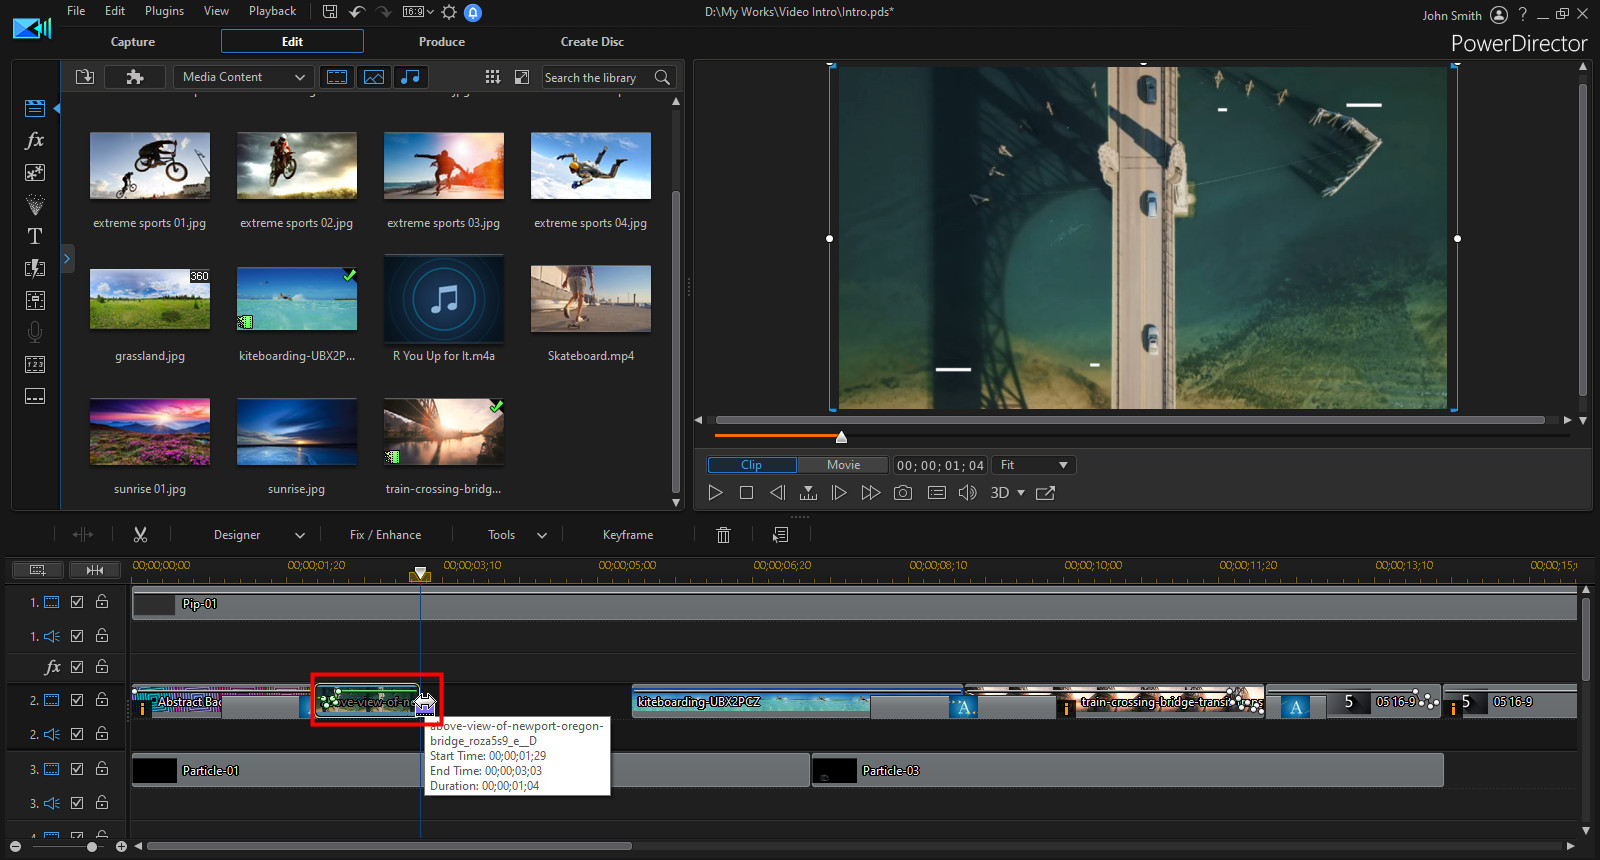
6. You can modify the duration and properties of added video clips, or change the default transitions and titles used in the express template. The media placeholders and effects included in the template are just a guideline, so feel free to make the video your own.
2. Add Motion Graphics Titles
PowerDirector provides ready-to-use titles with motion graphic elements that will elevate any YouTube intro video. You can easily drag-and-drop them within your project to add stylish titles to your video. To add a motion graphics title:
1. Go to the Title Room.
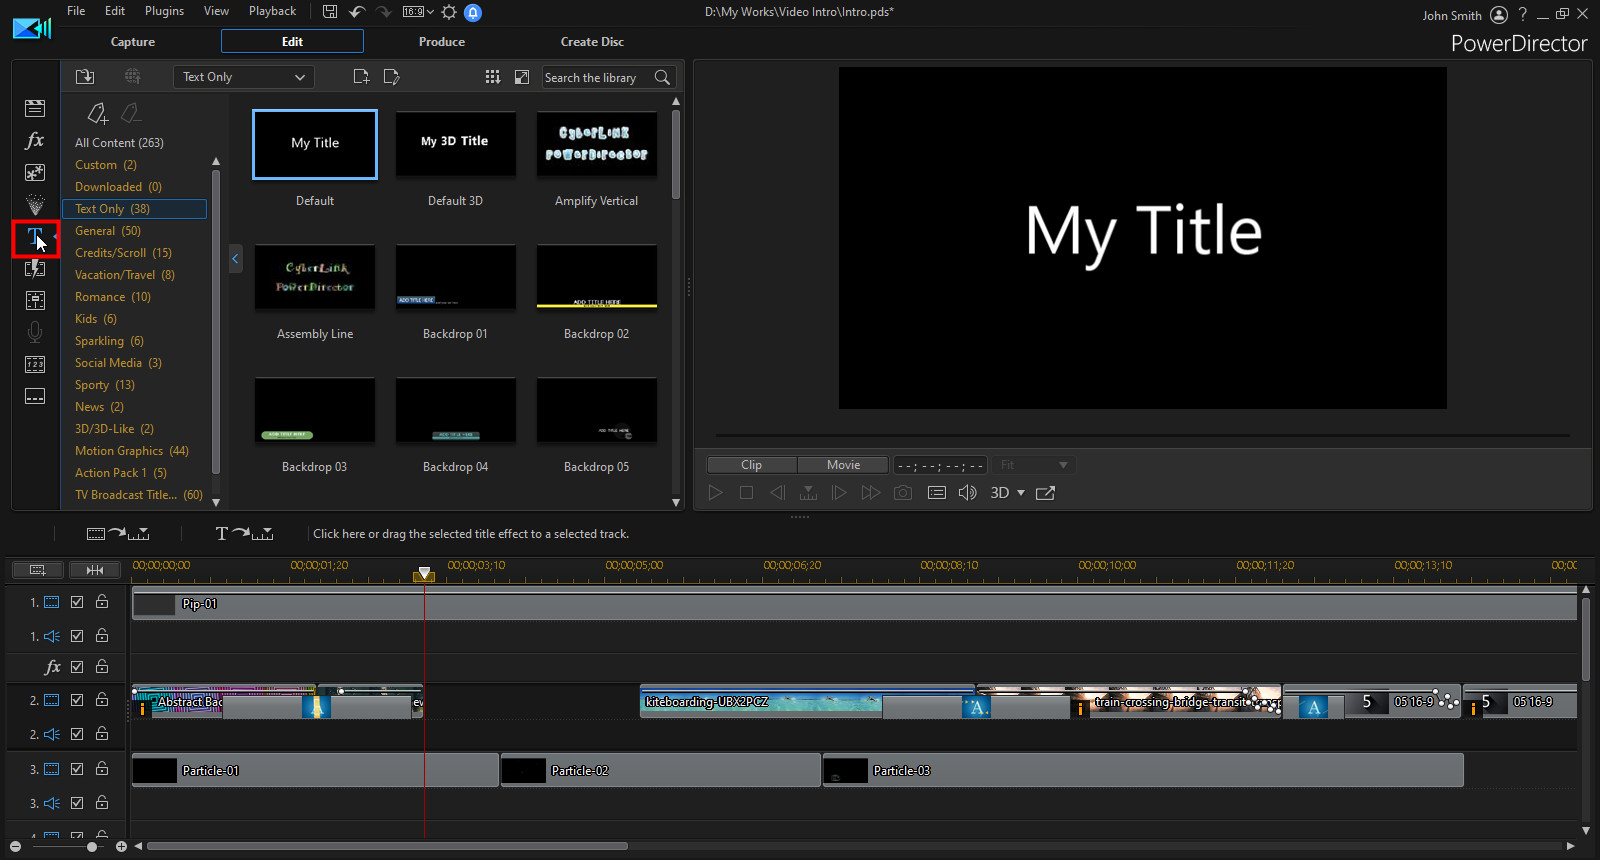
2. Select the Motion Graphics tag and then choose one of the title templates to use in your video intro.
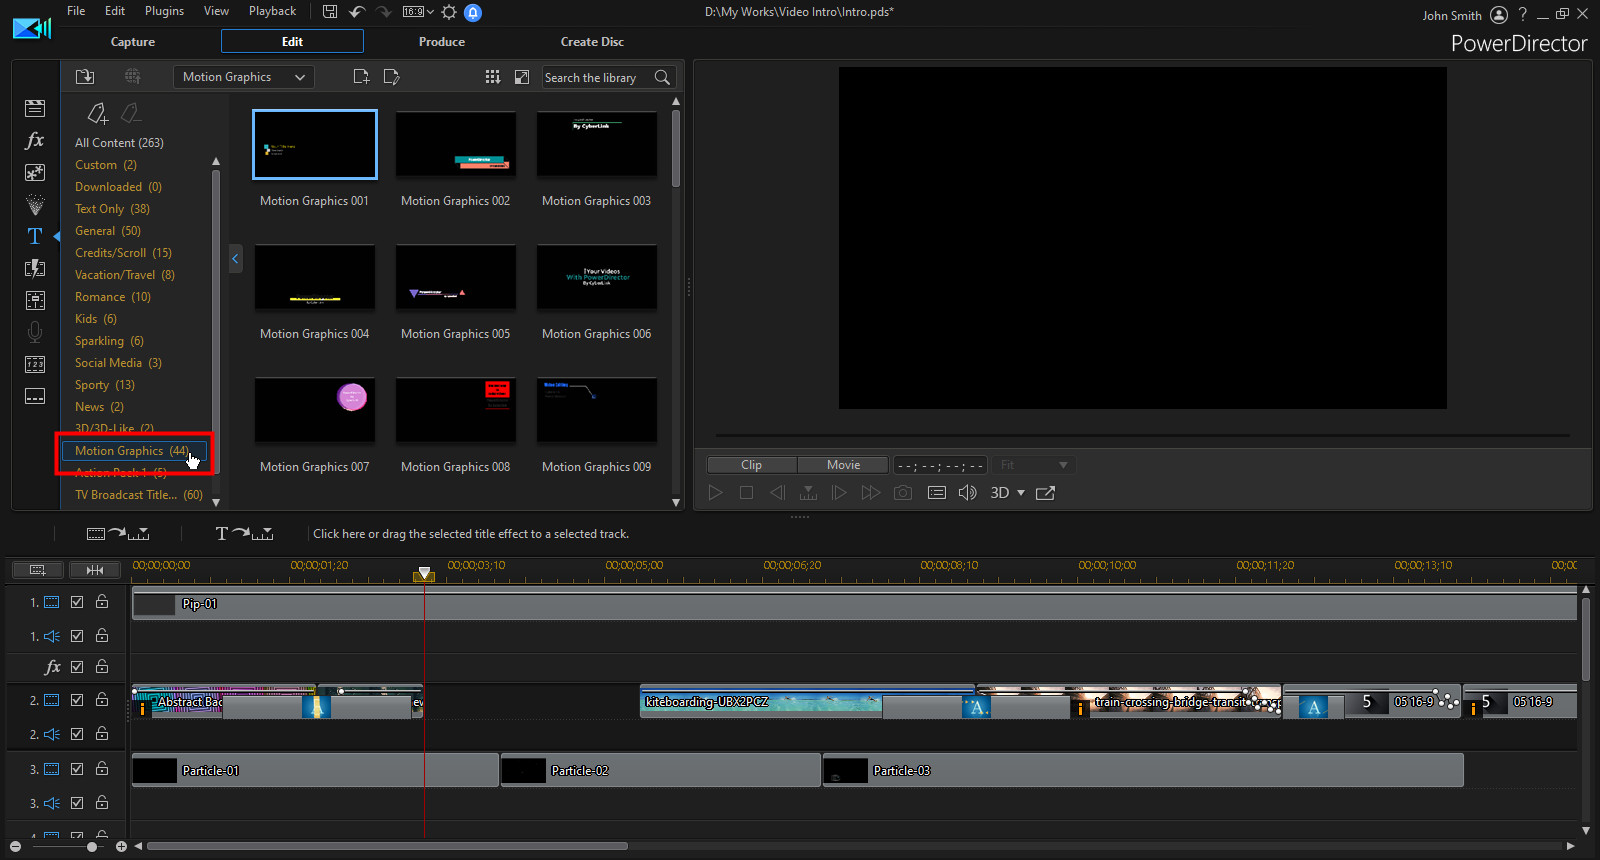
3. In our intro video example we used the Motion Graphics 006 and Motion Graphics 012. These motion graphics titles are added during the PowerDirector installation.
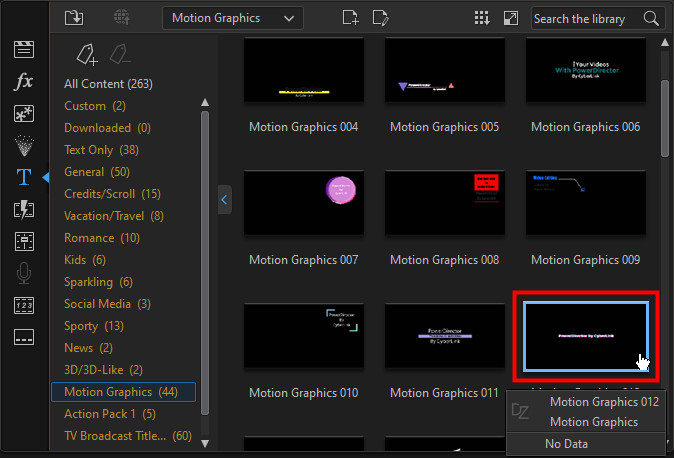
4. Drag the motion graphics title to the video timeline.

5. Double-click on it in the timeline, or select it and then click the Designer button, to modify it in the Title Designer.

6. Modify the title text and object settings as required in the Title Designer and then click OK to save your changes.

If neither of these two basic motion graphics titles fit your needs, you can download premium motion graphics for free with a PowerDirector 365 subscription.
3. Add Particle Objects
Particle objects can add spice and cool effects to your videos. In our intro video we used a particle named Colorful Smoke from the latest Weather Particle pack that is provided for free to PowerDirector 365 subscribers. To add this particle:
1. Go to the Particle Room.
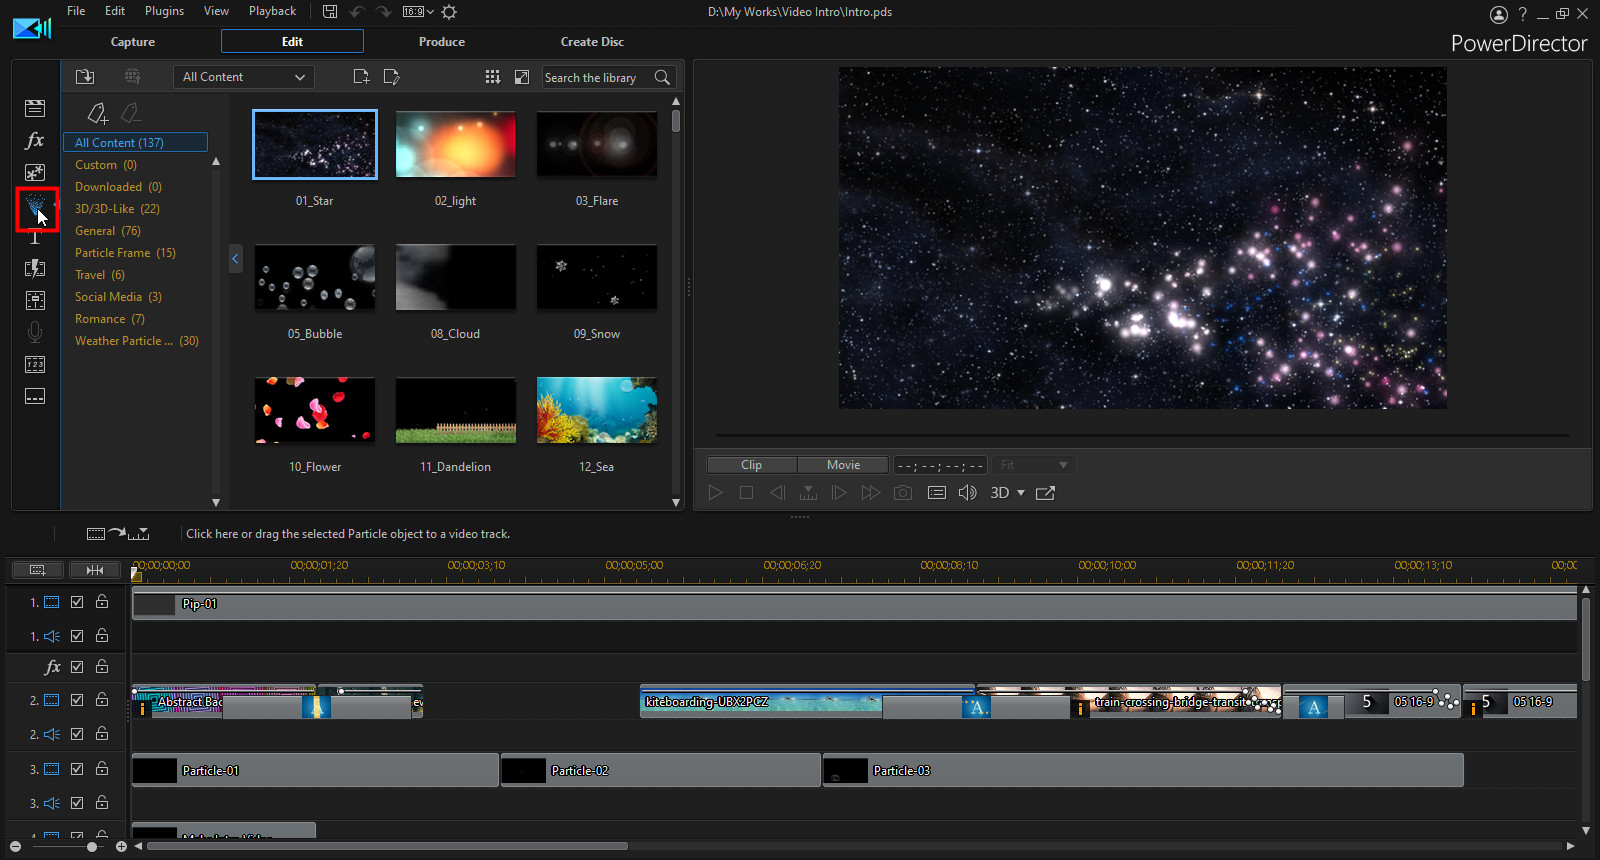
2. Select the Weather Particle tag and then choose one of the available particle objects.
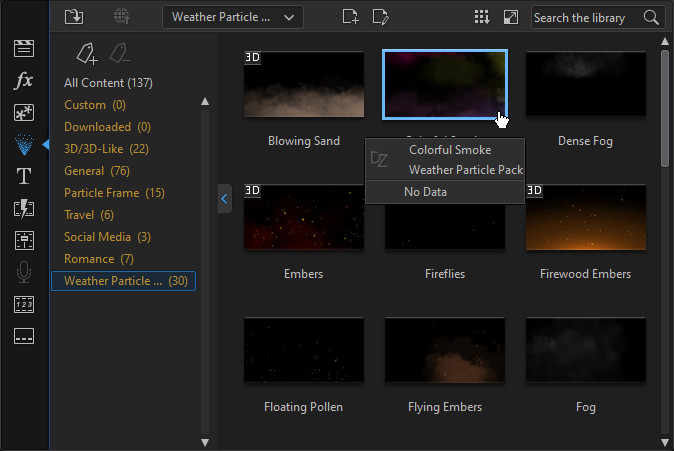
3. Drag it to the video timeline. We replaced the particle from the original express template with this new particle Colorful Smoke included with a PowerDirector 365 subscription.
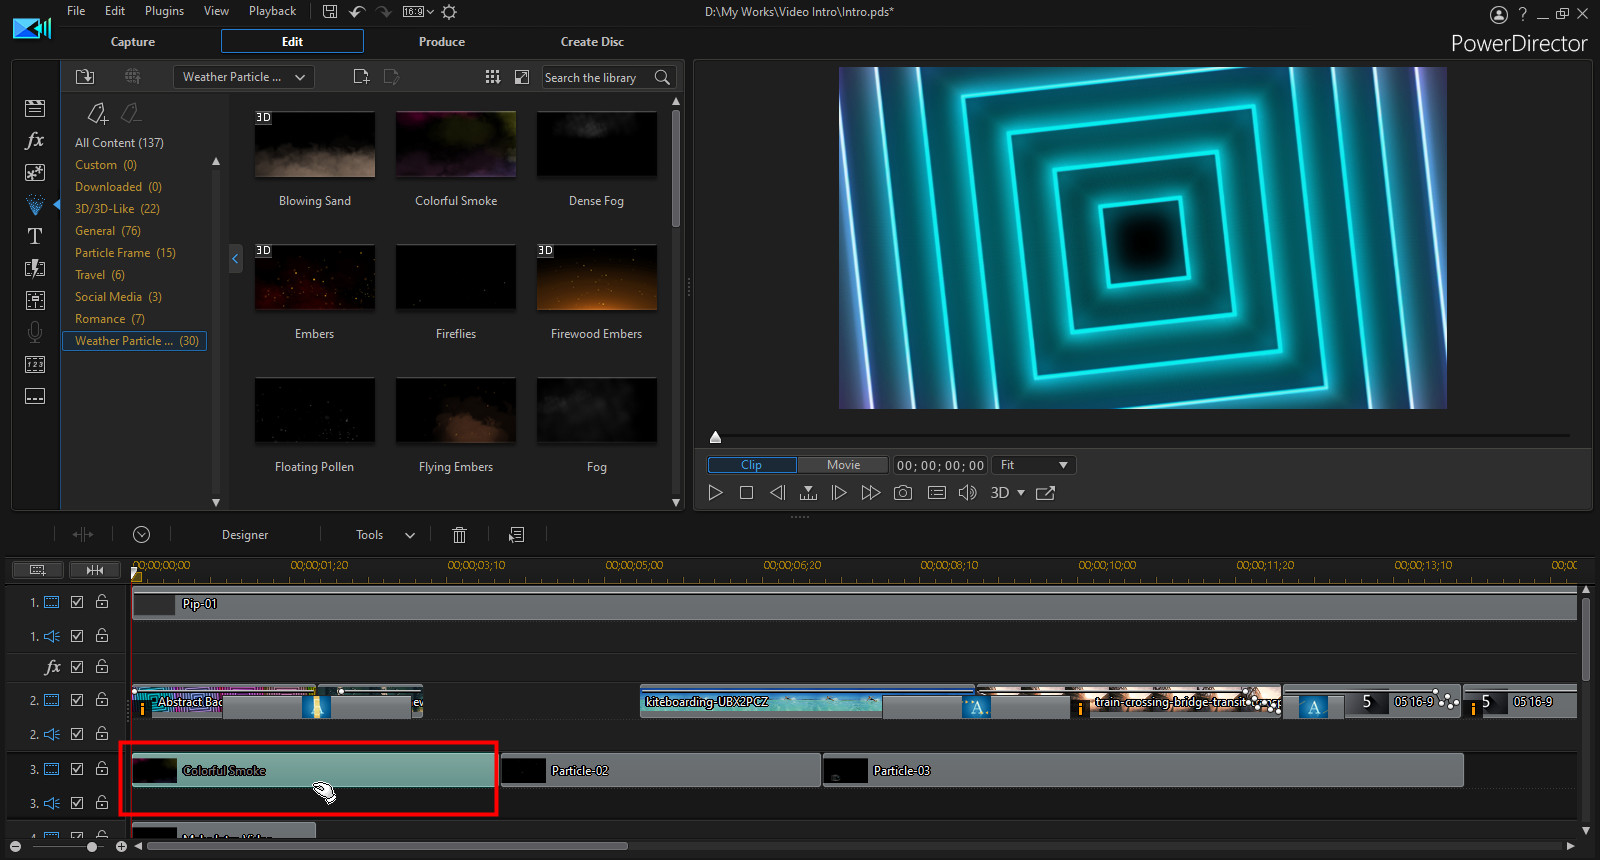
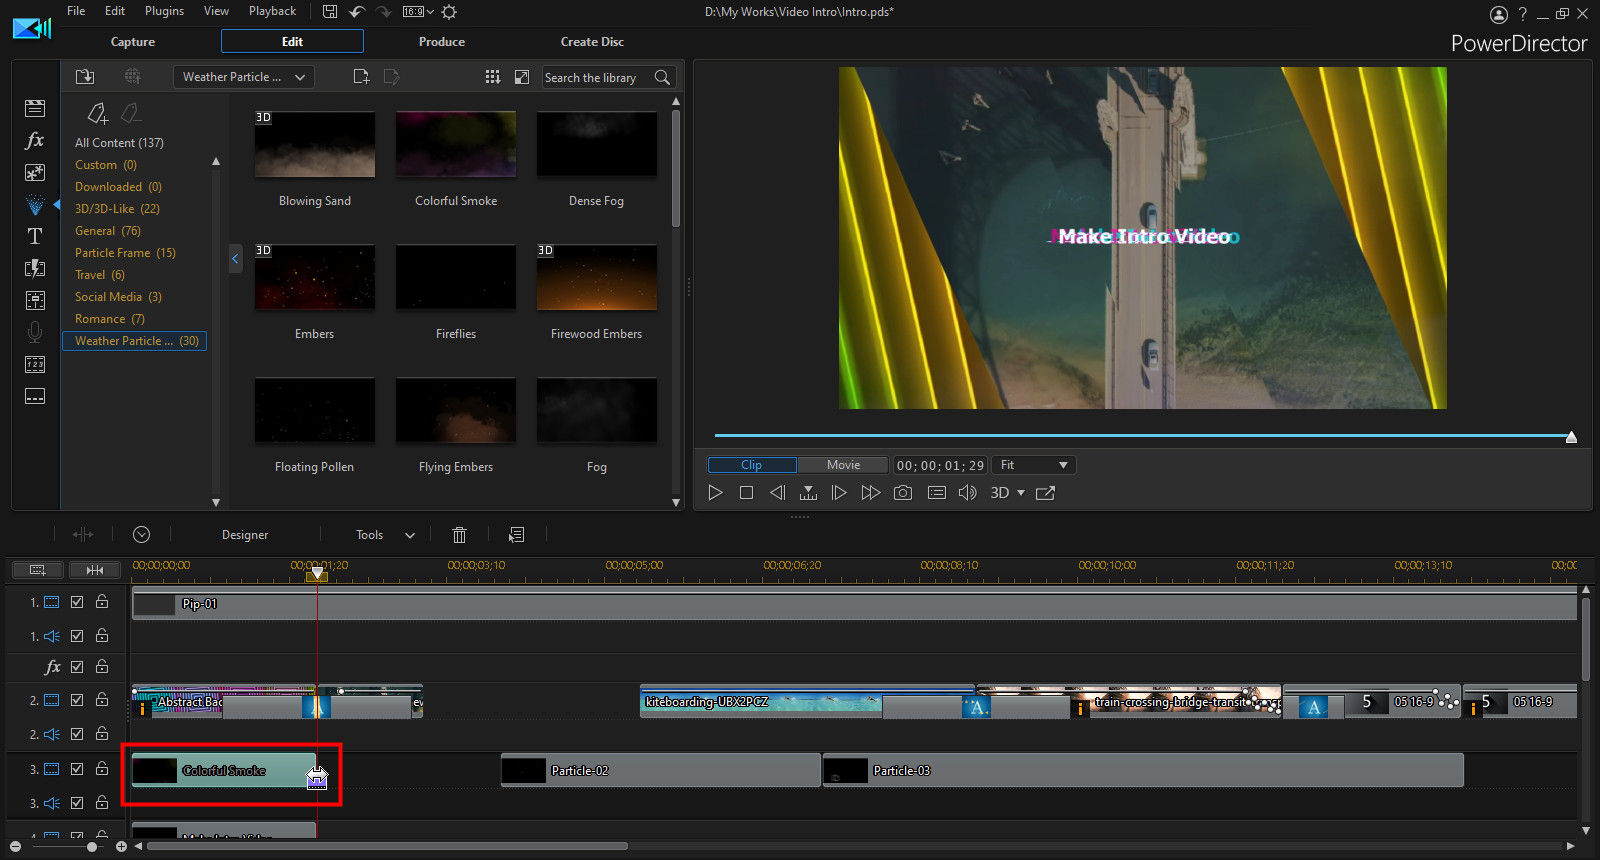
4. If required, modify the duration and properties of the particle object.
4. Add Transitions
Transitions help to convey a mood or tone in videos. In our intro video we replaced the default transition with one that transitions between clips quickly and with style, to give our video a fast paced look. To add a transition:
1. Go to the Transition Room.
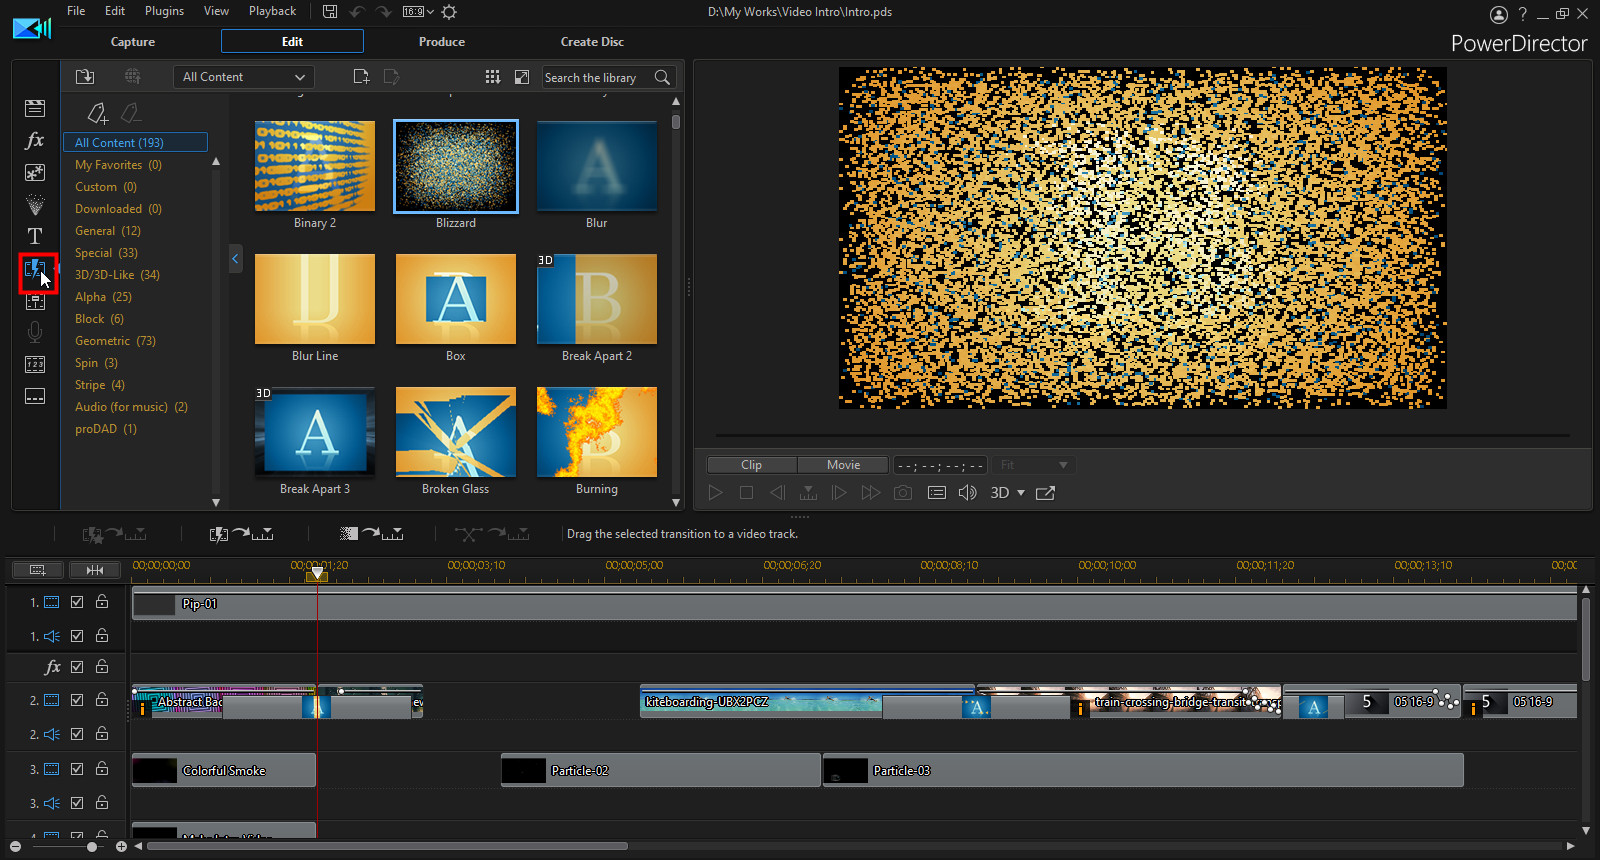
2. Select a transition to add to your intro video. We used the Zoom Out/In transition to give us the look we were going for.
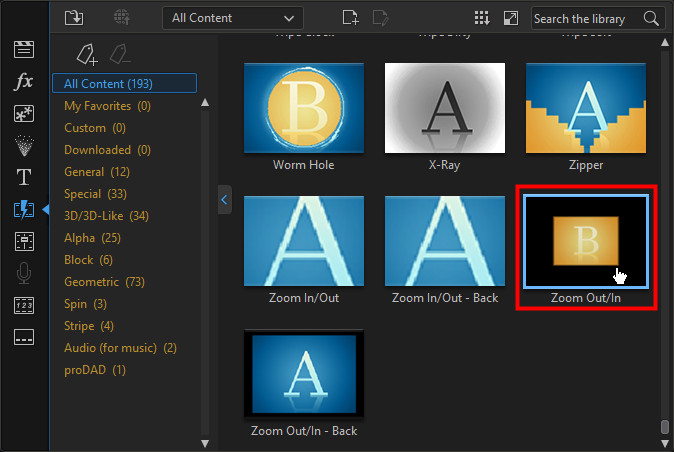
3. Drag it between two clips on the video timeline.
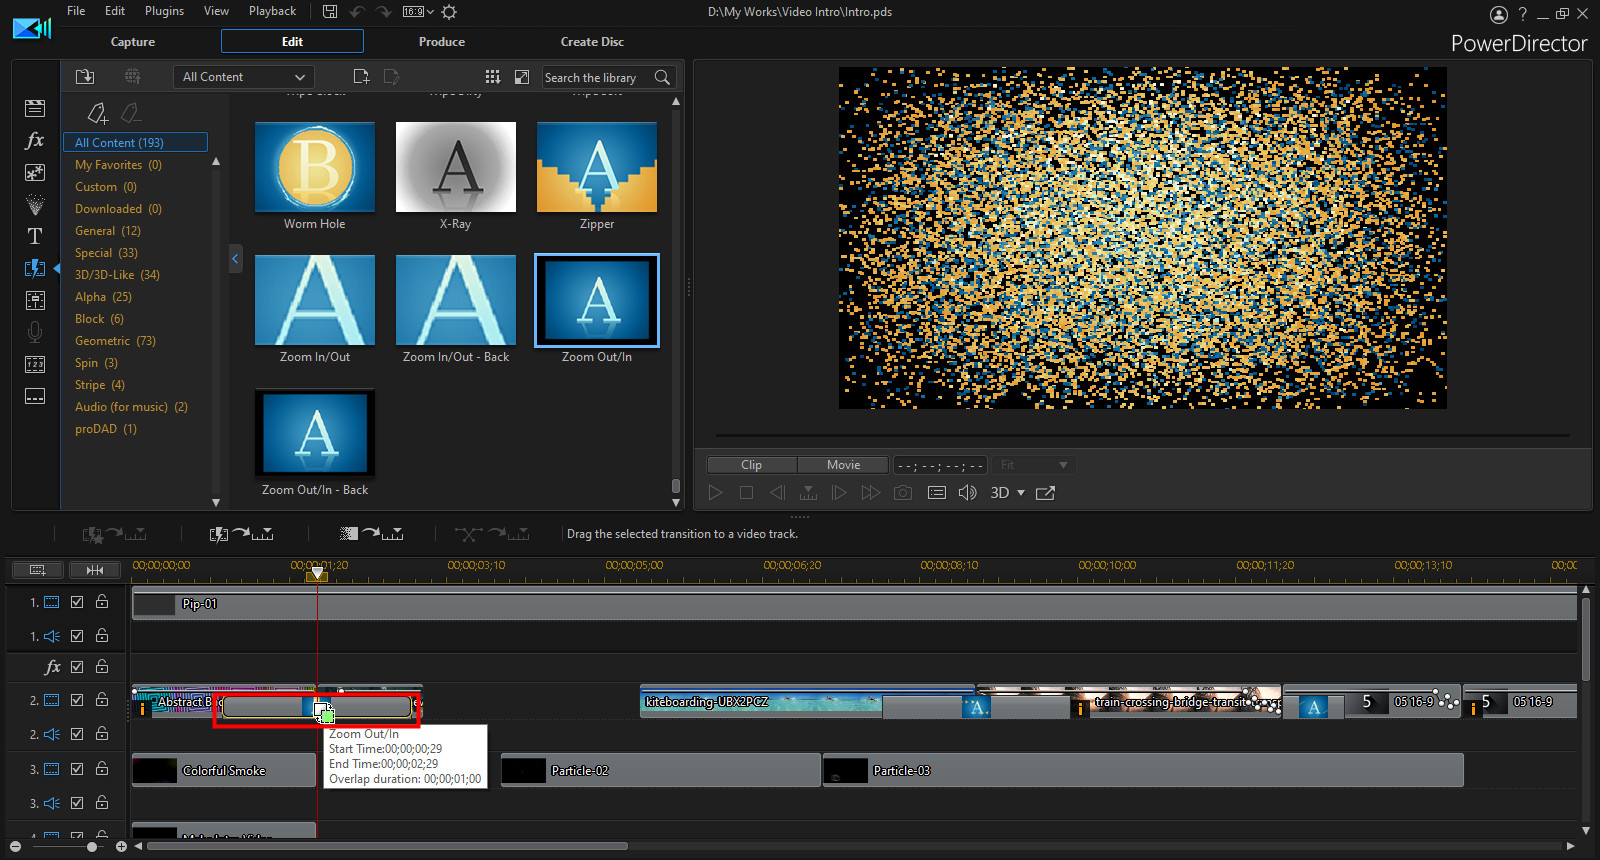
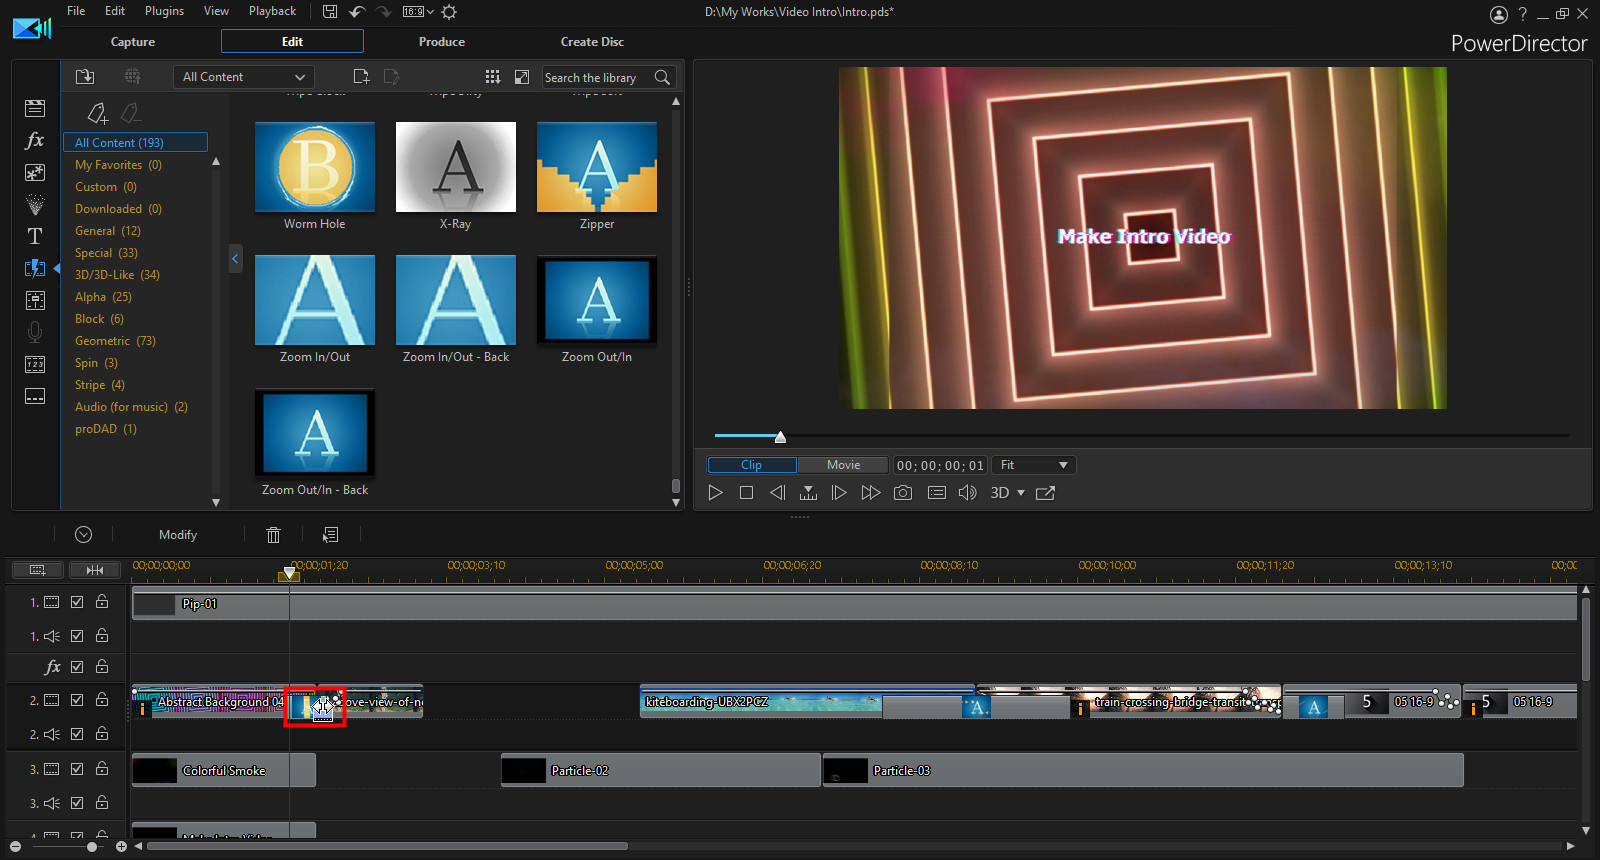
4. Modify its duration and properties as required.
5. Add Background Music
Background music is a must for all intro videos. Thankfully with a PowerDirector 365 subscription you get access to hundreds of music tracks. Too add background music:
1. In the media library window, select Background Music from the Media Content drop-down menu.
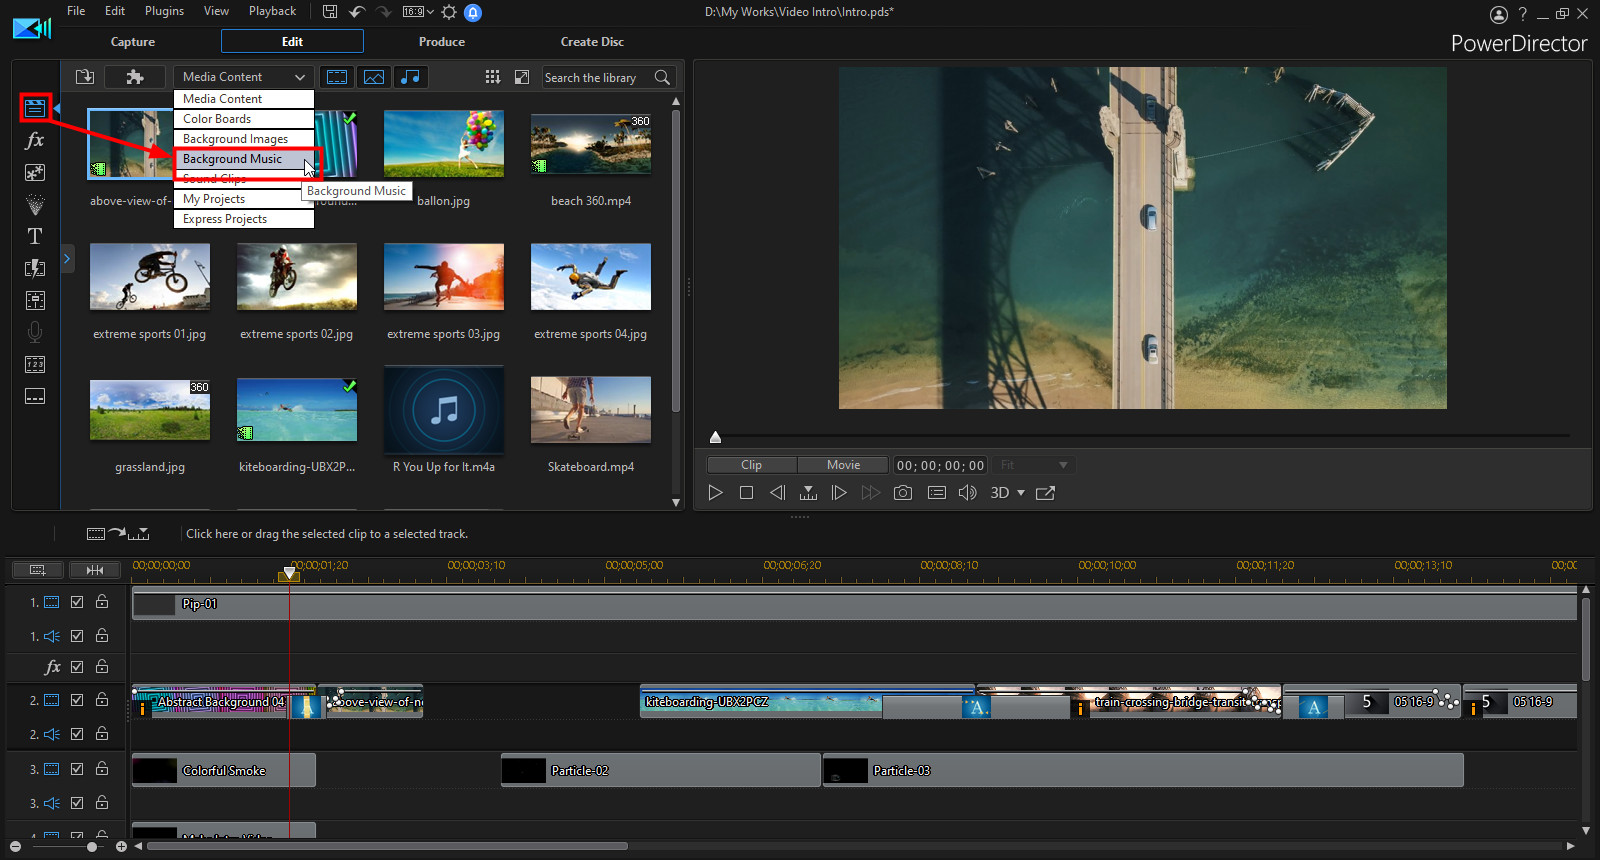
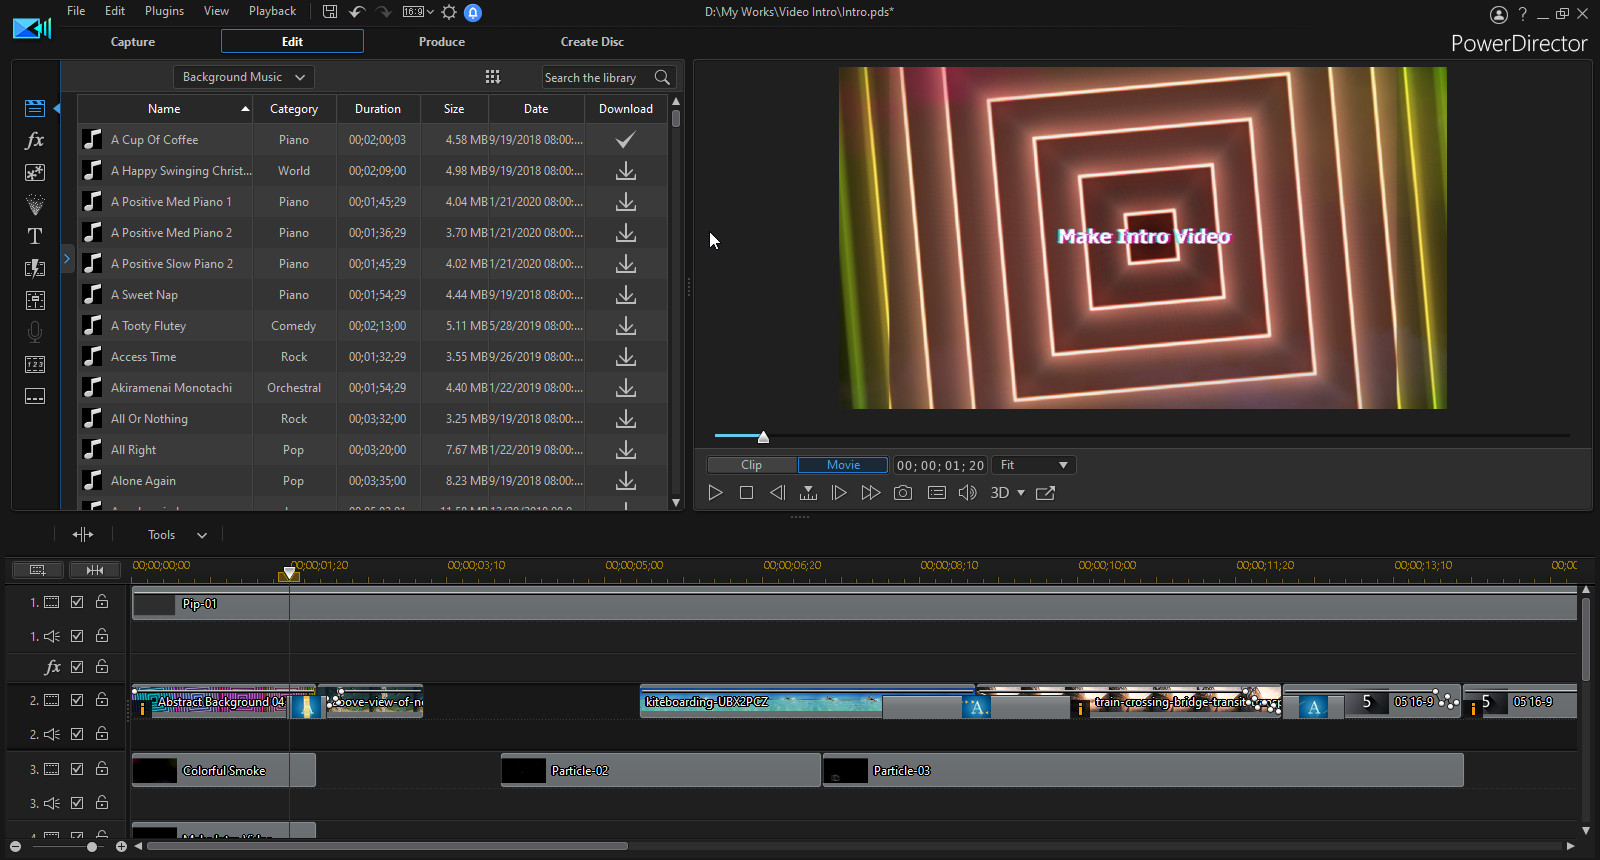
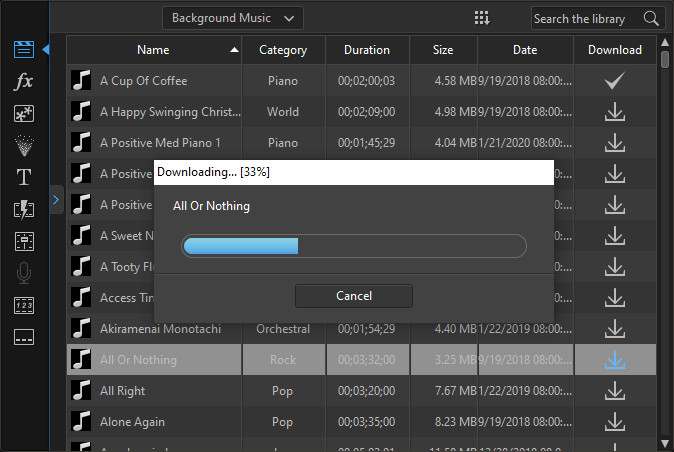
2. The first step is to preview and then download the background music track you want to use. In our intro video we used a track called All Or Nothing. Click the  button next to the track to download it.
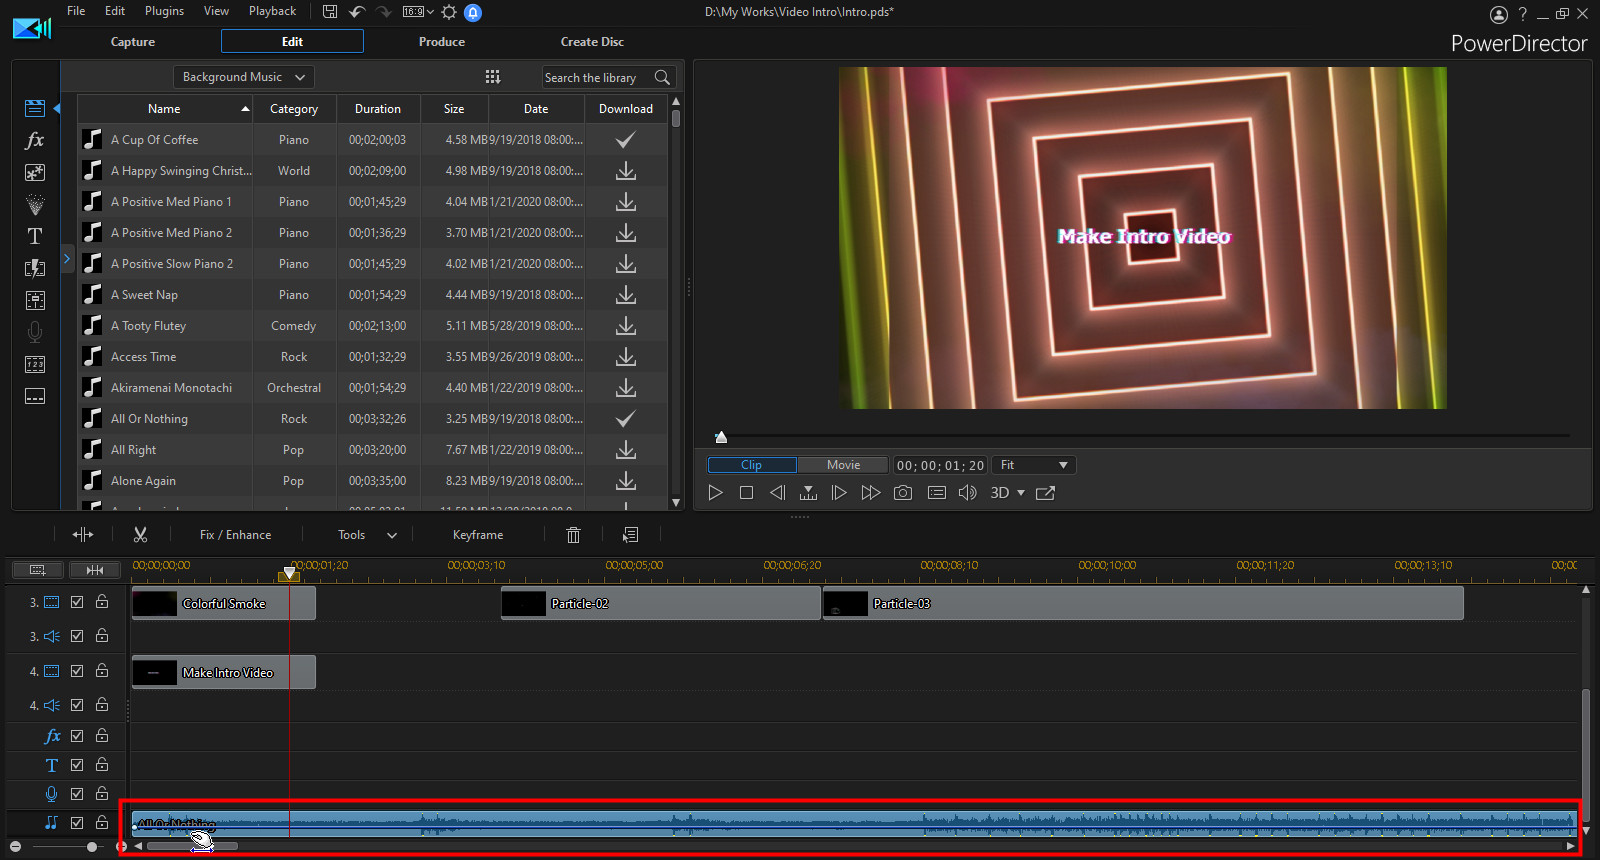
3. Once it has downloaded, drag it to the background music track on the video timeline.
5. Customizing Your Intro Video
After following the steps above, you now have an intro video. Use it as a starting point, and then customize it to create the intro video you want for your YouTube videos. With PowerDirector 365 you get access to lots of extra content you can use in your intro videos and all your YouTube content.
With a subscription you gain access to the exclusive library of express templates, motion graphics titles, and others effects, including particle objects, transitions, and more.
You also get access to background music tracks, sound effect clips, and even stock video that you can use in your intro videos.
Go download PowerDirector Essential now for free to start making your first intro video today. Once you have created an intro video, get feedback from video professionals and other PowerDirector users by posting a YouTube link in the PowerDirector Showcase.
Get PowerDirector 365 Essential for Free
Take your videos to the next level with the best video editor for Windows PC


