
Introduction of Timeline Tracks for Video & Audio

Timeline is the main working space of PowerDIrector, where you can arrange all your source material - videos, photos, music and effects. In this tutorial, we will walk you through the behavior of PowerDirector Timeline, which is very useful for all PowerDirector users.
Adding and moving Timeline Tracks
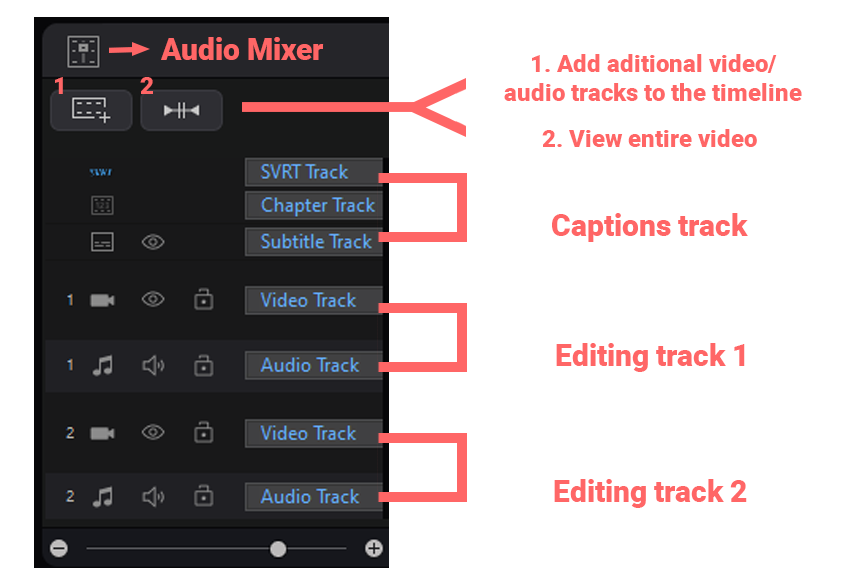
The editing workspace contains an editing track, which contains a video track and an audio track, and a captions track.
Adding Tracks
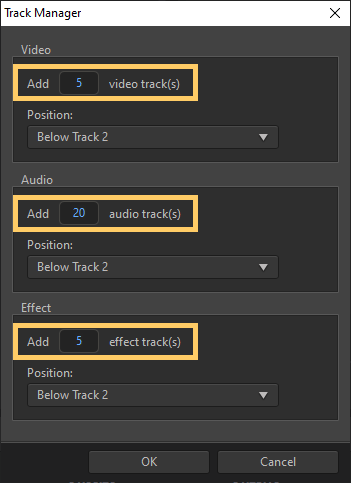
Click  to add additional video, audio, or effect tracks in the Track Manager.
Tip
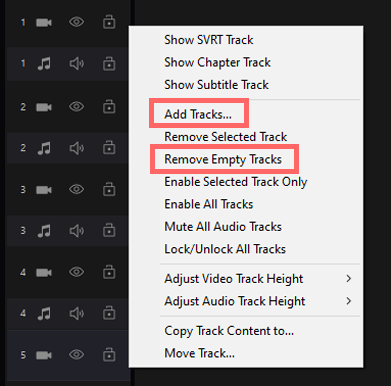
You can also right click on the timeline and select Add Tracks. To remove unwanted tracks that don’t contain any media, just right click and select Remove Empty Tracks.
Knowledge Base
You can add particle objects, title objects, and PiP objects to a video track to bring more creativity into your production.

Moving a track
You can manually arrange the order of the tracks in the timeline, setting what media displays on top of the other media. The media on the track with the highest number displays on top of the other media, overlapping the other corresponding media in the preview window.
1. Change the order by dragging editing track 3 up.
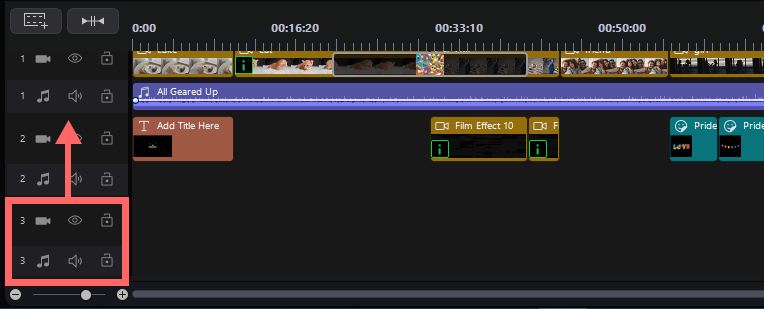
2. Hold down the left mouse button and drag it above the effect track.
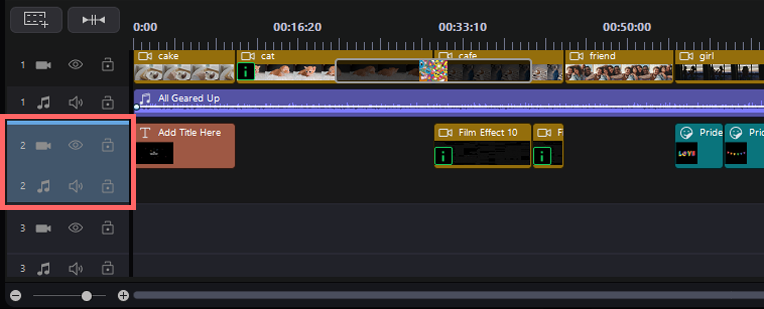
3. After you release the mouse button, editing track 3 becomes editing track 2, and the order of all the tracks are rearranged.
Locking/Unlocking Tracks
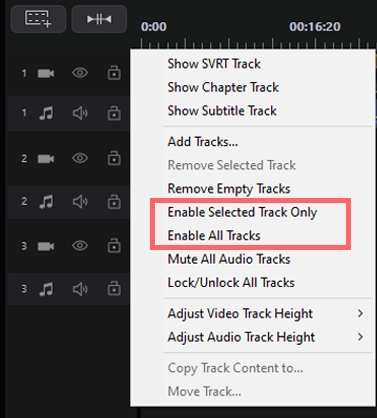
When you are editing lots of media on multiple tracks, you can use the lock/unlock and enable/disable buttons to lock or hide tracks that contain edited content.

Right click on a track and then select Enable All Tracks so that all the media content on the timeline tracks can be displayed in the preview window. If Enable the Selected Track Only is selected, only the content on the selected track will be displayed.
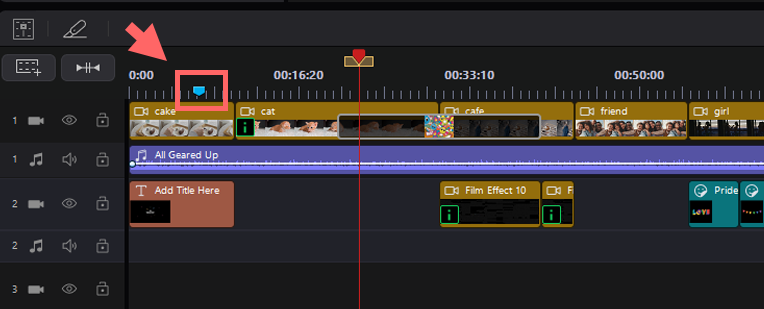
Timeline Markers
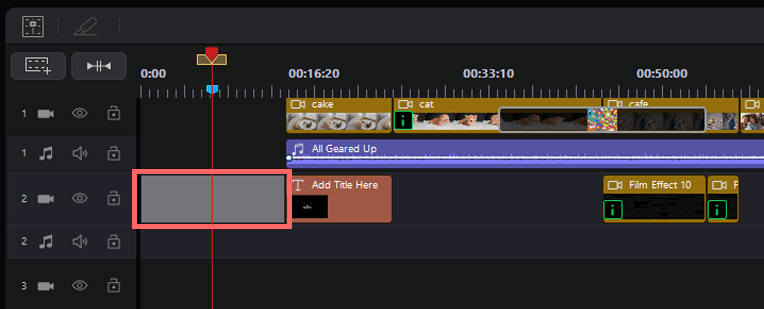
You can add timeline markers to the timeline ruler for more precise media clip placement on the timeline. Media clips snap to the timeline markers the same way they snap to grid lines in the preview window.
Adding Timeline Markers
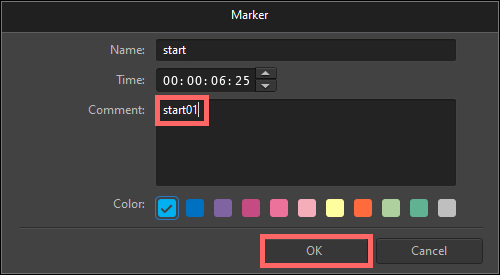
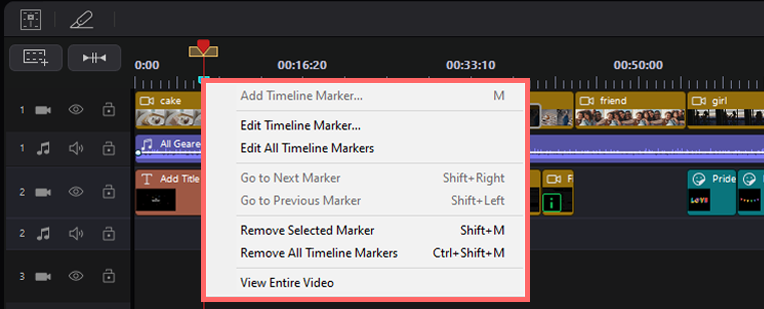
1. Right click the mouse on the timeline ruler and then select Add Timeline Marker.
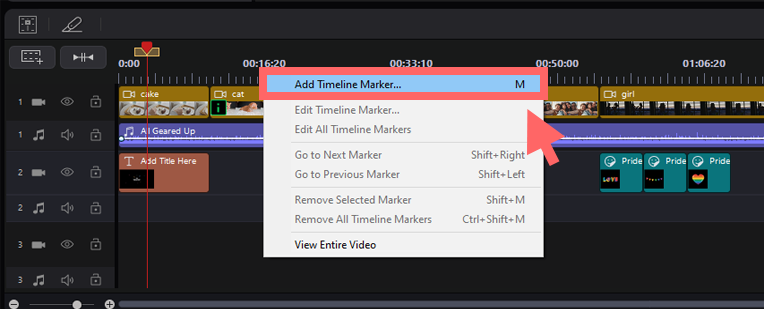
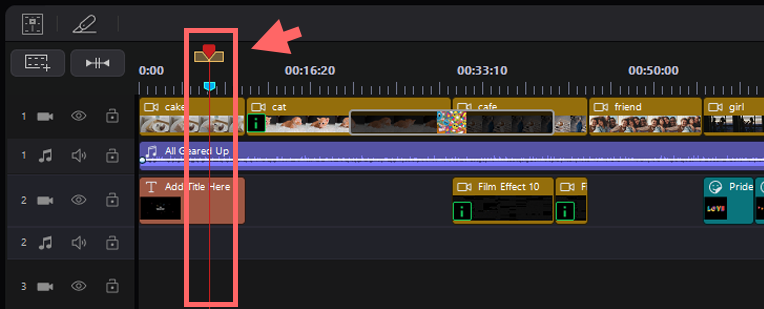
2. You may input a Comment for the new timeline marker and then click OK.
3. The new timeline marker is added.
4. When you move media clips to the position of a timeline marker, a line appears, allowing your media to snap to it.
Extra Information
You can drag a timeline marker to a different position, if necessary. You can also double click on a timeline marker to remove or rename the marker, and to view more options.
Removing Gaps on Timeline & Repplie Editing
While you are adding media clips to the workspace, sometimes media clips are not placed side by side on the timeline, resulting in moments with a black screen in your production. Here’s how to solve this issue.
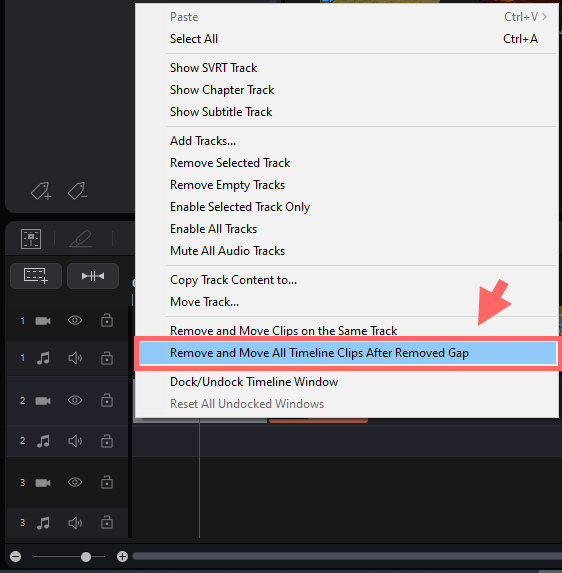
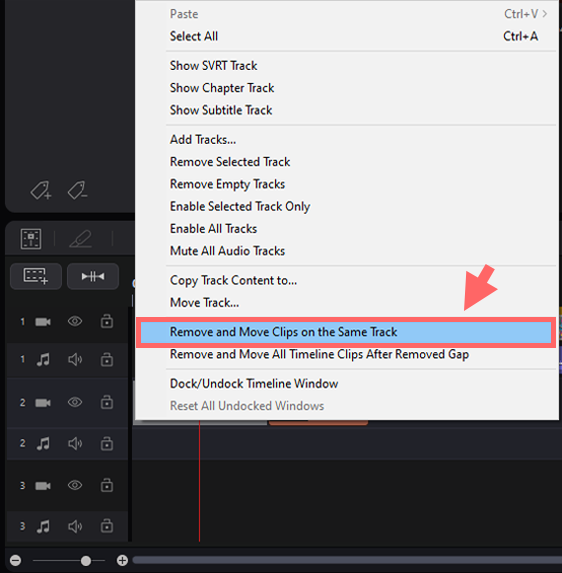
Right click on the unwanted gap and then choose a way to remove it.
Case 1
If you want the media on all the tracks to move after a gap is removed, do this:
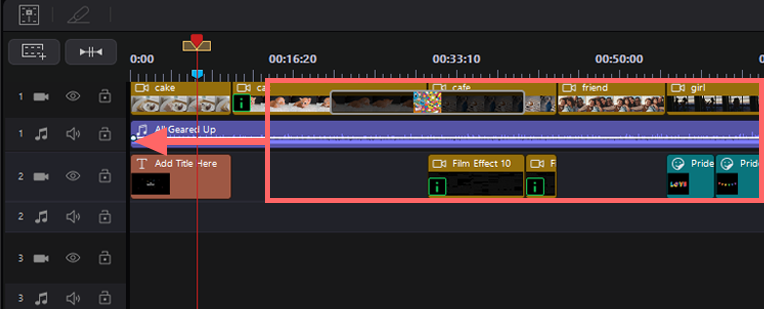
1. First right-click the gap, then select Remove and Move All Timeline Clips After Removed Gap.
2. All the media below will move to the left.
Case 2
If you want all the media on the other tracks to remain in the same place after a gap is removed, do this:
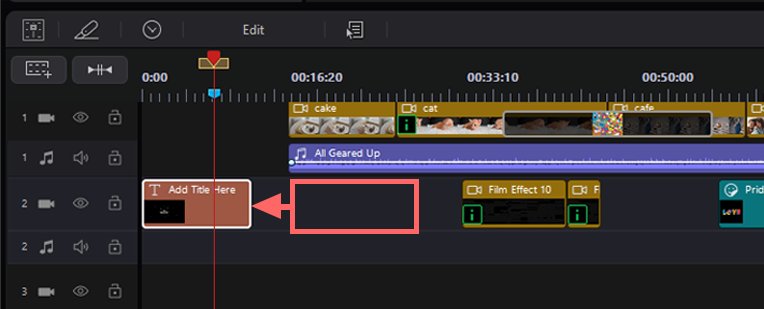
1. Select Remove and Move Clips on the Same Track.
2. After the gap is removed, only the media clips on the same track moves. All the other media clips stay where they were.
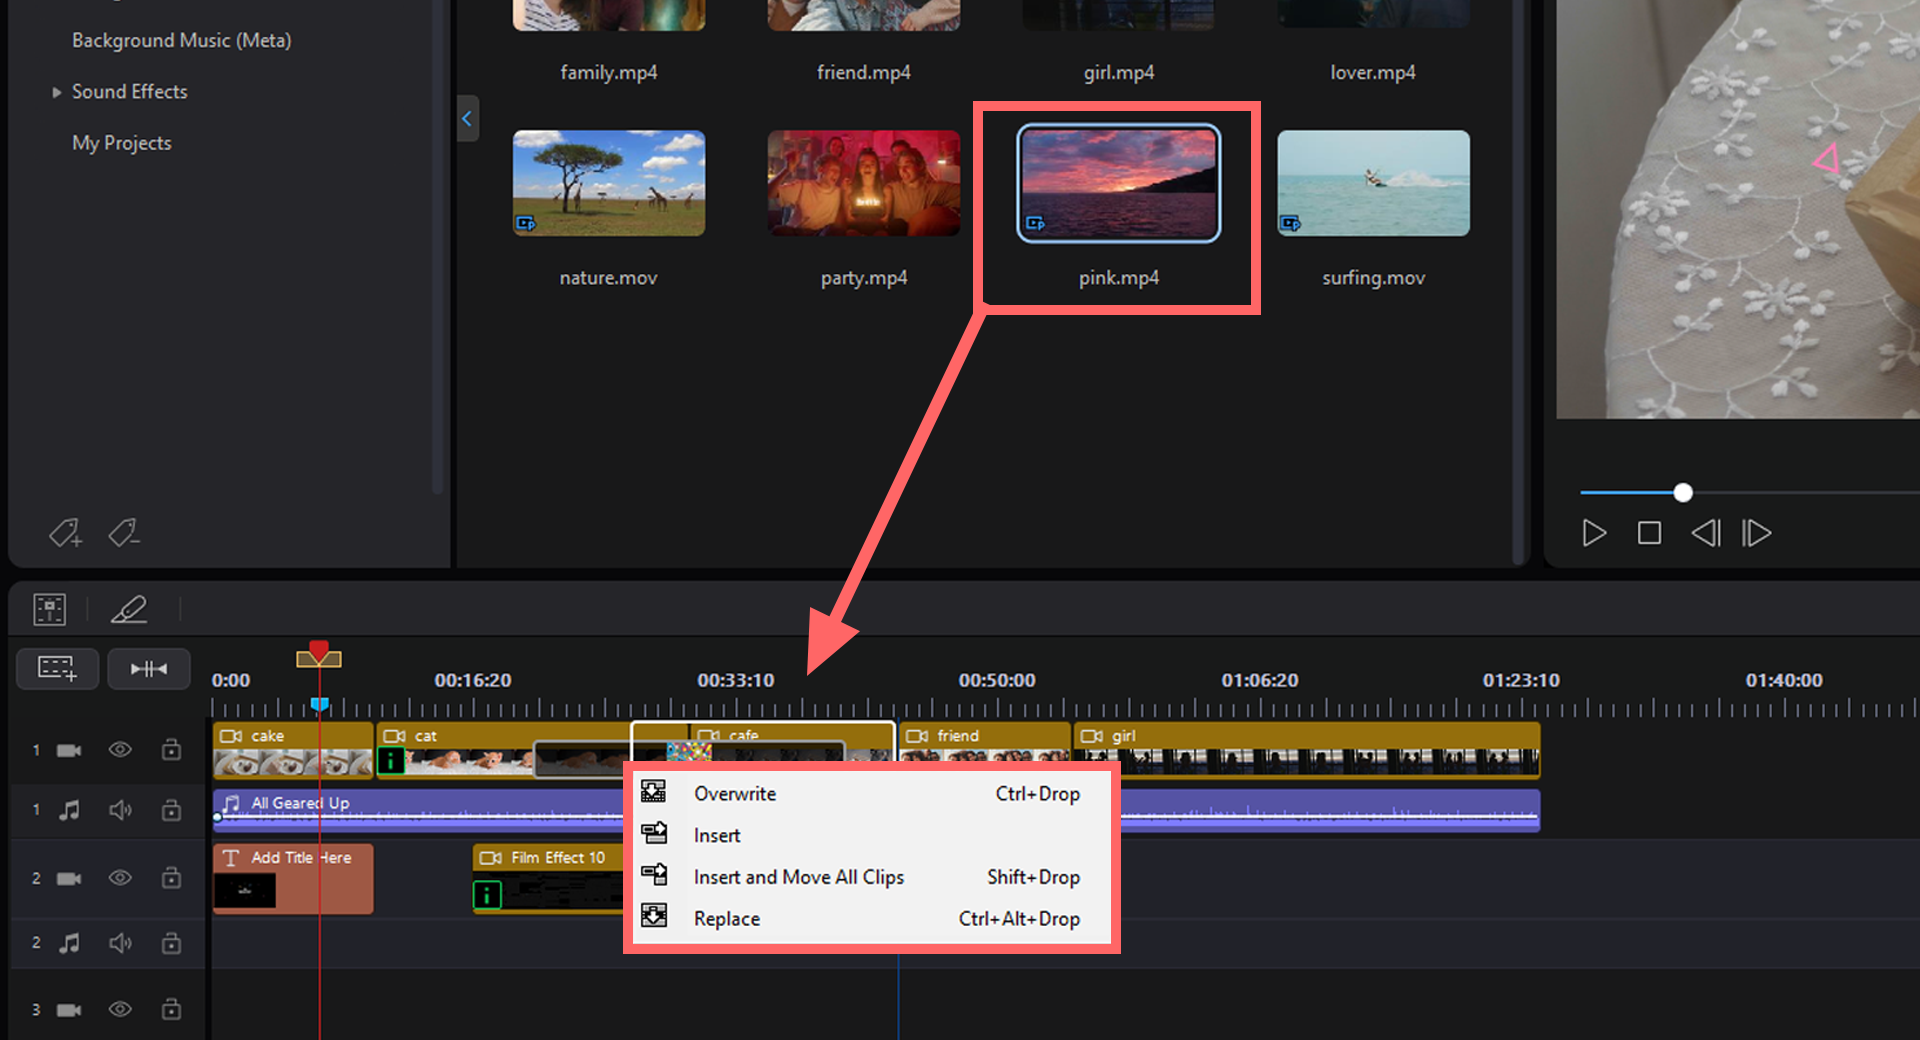
Inserting/Overwriting Clips
When you add a new clip to the timeline, you can choose to Insert it or Overwrite other existing clips on the timeline.
Get PowerDirector 365 Essential for Free
Take your videos to the next level with the best video editor for Windows PC
