
How to Resize Photos to Share on Facebook

Why do the photos look so much better on your desktop than they do online? There are manyreasons and to name a few:
Compression: Facebook and most social sites don’t want our photos to take too much space on their servers, so even if you select the “high-res” option on Facebook, it still compresses your photo. Taking out pixels out of any image will degrade the quality.
Color Space: The web mainly uses sRGB. There are other selections in PhotoDirector such as aRGB or ProPhoto RGB that are much larger color space. These color spaces lets you see more color variations in the photos that browsers cannot.
Sharpness: When a photo is resized, it throws some details out. To make your images look better, follow the steps below when exporting your photos for facebook:
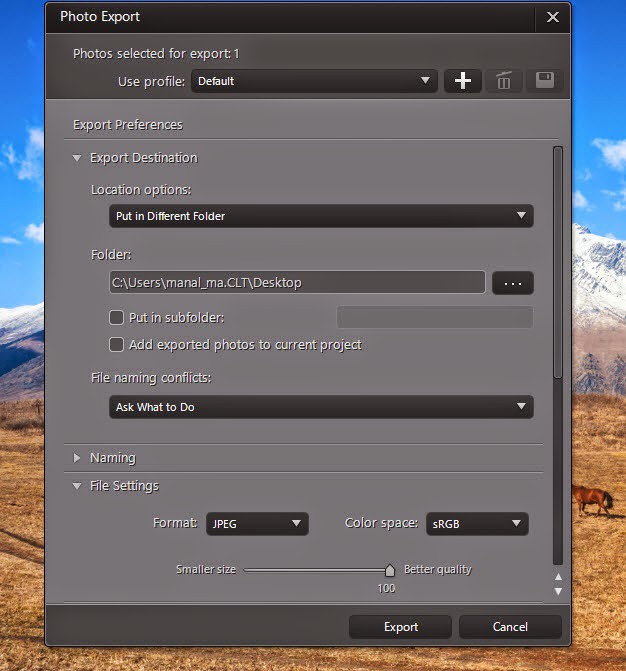
Select a photo to share on Facebook and right click to “Export Selected Photo”. In the Export menu there is a list of settings. First select where you want to save the file. In this tutorial we will save the image to Desktop. As for naming, I usually don’t make any changes to this section.
Now for Export Preferences, select JPEG for file format, sRGB for color space and 100% for image quality.
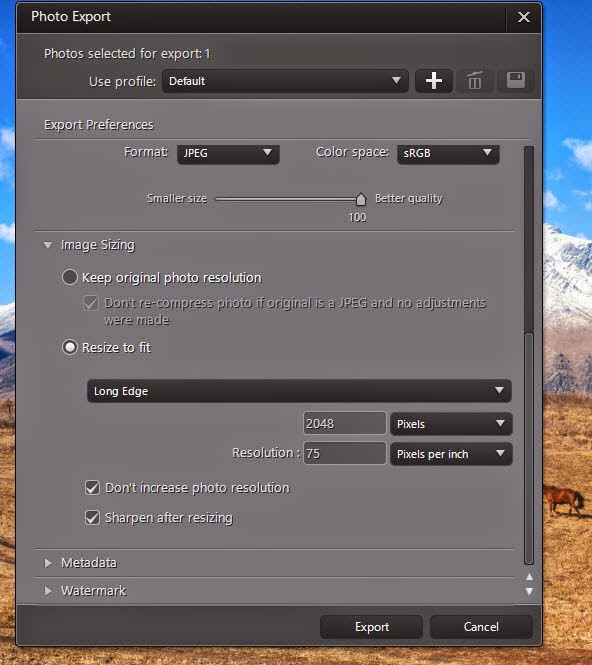
In the Image sizing section, select “resize to fit” and define “long edge” to 2048 pixels.
2048 is the recommended size for Facebook photos. Set resolution to 72 pixels per inch.
Make sure “Sharpen after resize” and “Don’t increase photo resolution” are selected
Now, your photos will look much better when you share on Facebook.
You can save this Export profile and select it whenever you want to Export to Facebook.
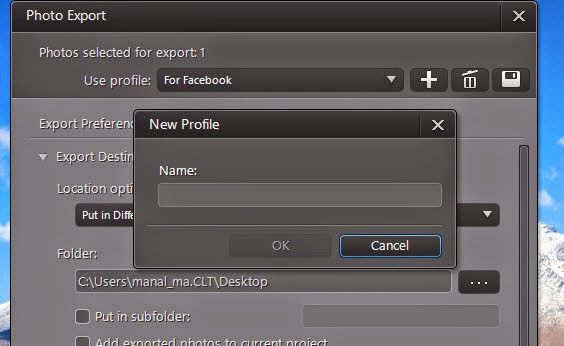
This will make your workflow even faster.
PhotoDirector 2026 Essential
Free Software With 30-Day Premium Features
