How to Add Text to a Video on Mac and Windows

Text, including captions and video titles, will give your videos a more complete feel. Text can be used to give additional information, educate, and even get a laugh.
Follow our step-by-step tutorial below to learn how to add text to a video on a Mac or Windows PC. If you're looking to add text to videos using a mobile device, head on over to our guide for adding titles and text to videos on iPhone and Android.
- Instructions on How to Add Text to a Video
- Upload Your Video to PowerDirector
- Navigate to Title Room
- Choose the Text Type to Add to Your Video
- Edit the Text
- Save Your Text as a Template
- Ensure Text is Above Your Video Footage
- Copy, Paste and Insert the Template Throughout Your Video
- Export Your Video
- Add Text to Your Videos Effortlessly
Instructions on How to Add Text to a Video
For demonstration purposes, we will be using the video editor PowerDirector. It's free to download on both Windows and Mac so you can follow along with this tutorial.
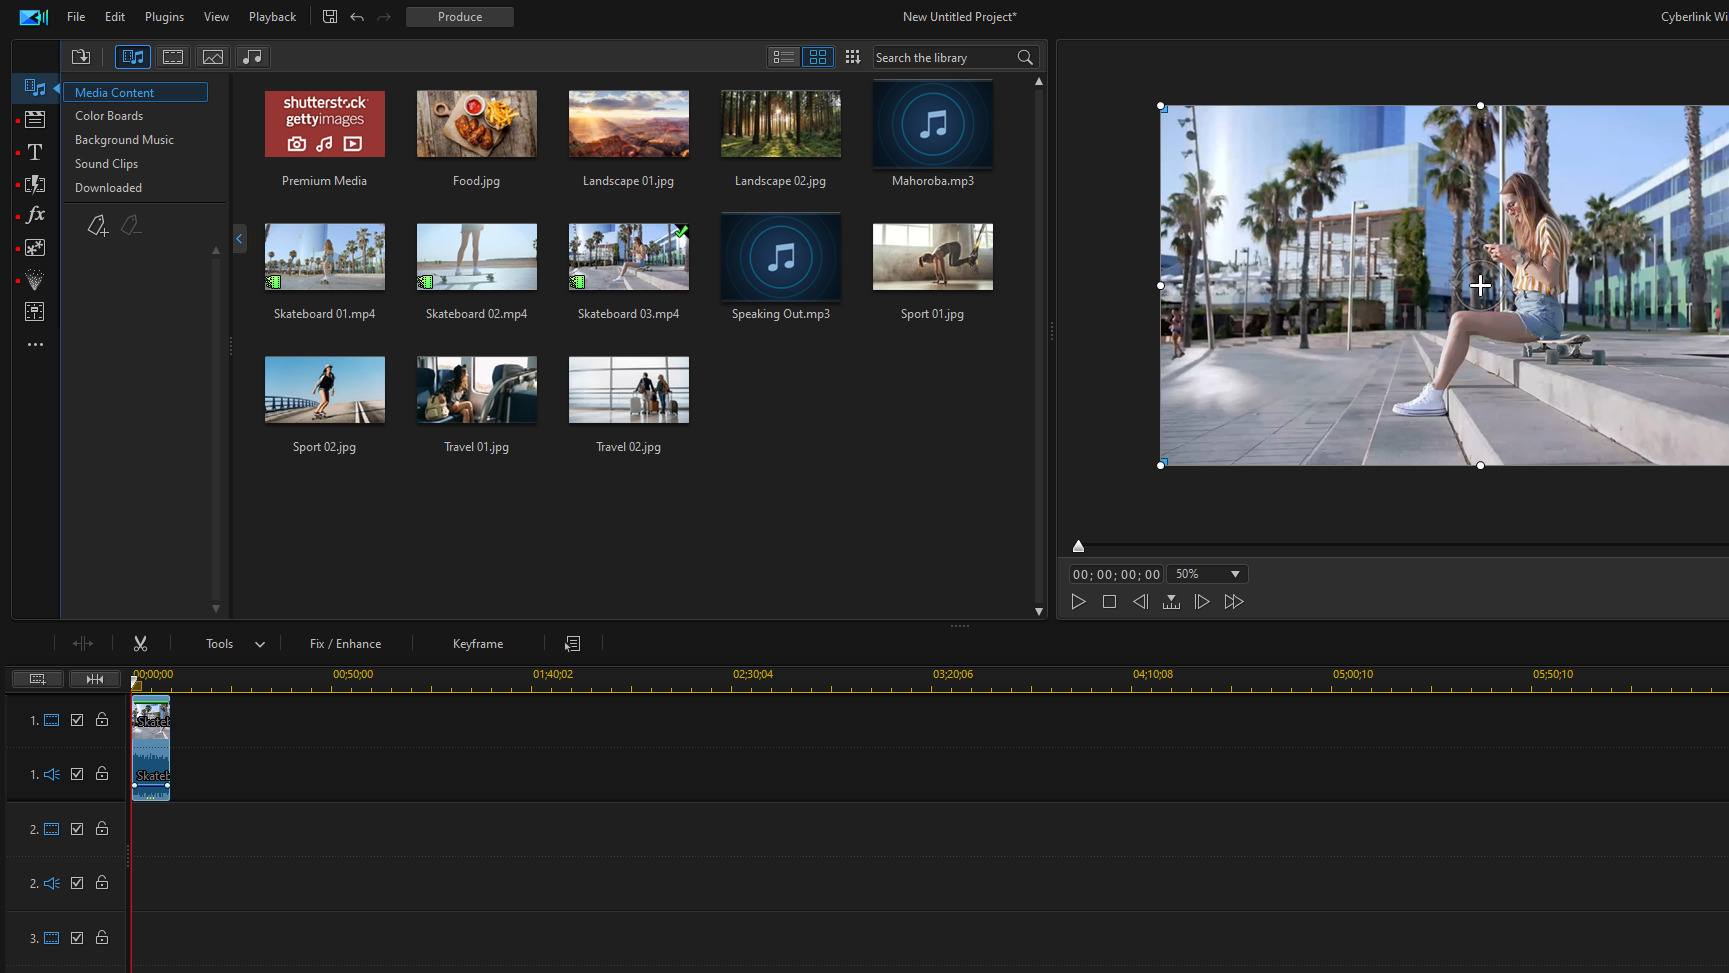
1. Upload Your Video to PowerDirector
Once you have downloaded and installed PowerDirector upload your video to Media Content then drag and drop it onto the timeline.
2. Navigate to Title Room
Next, open the Title Room which is delineated by the T icon in the left-hand side tool bar.
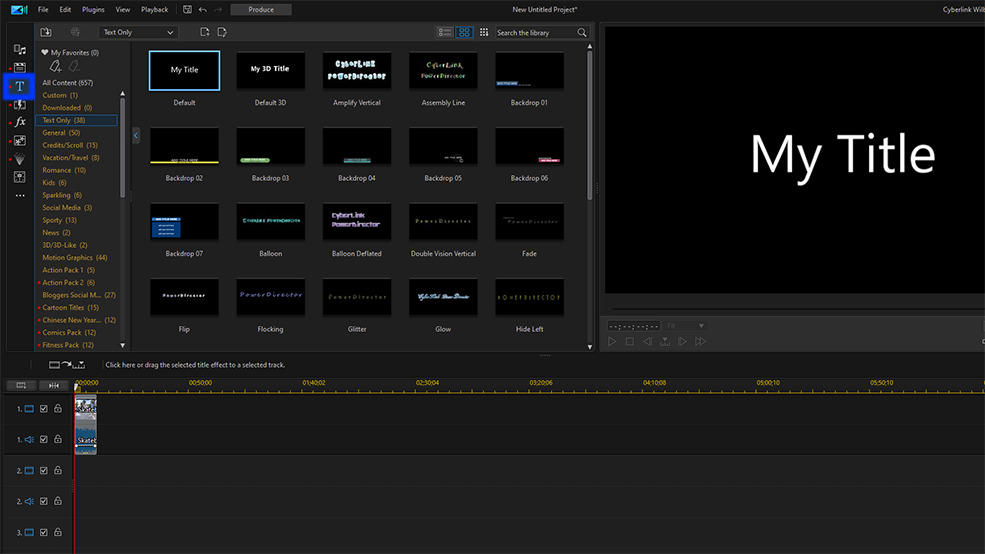
3. Choose the Text Type to Add to Your Video
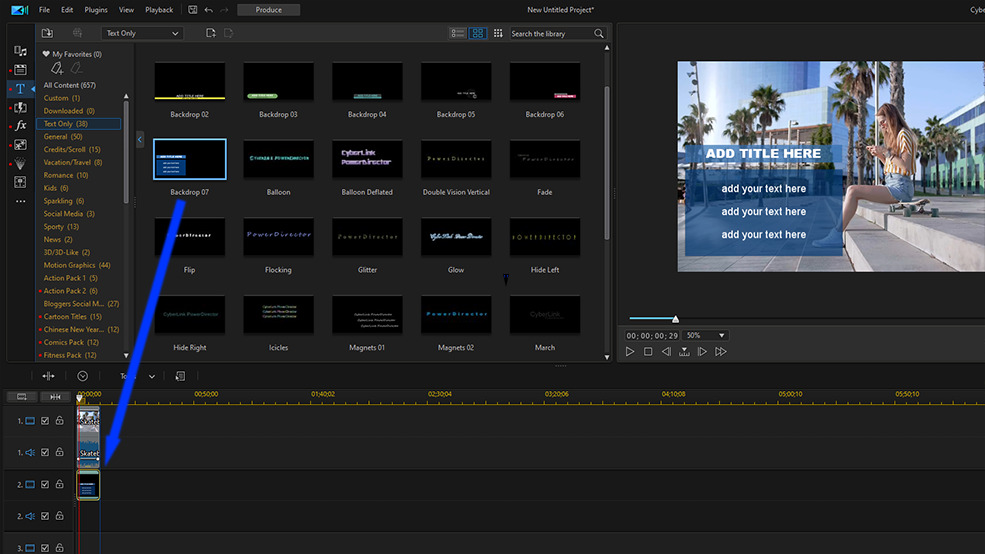
There are hundreds of text templates with different fonts, colors, spacing, and animation effects. Find a template you like and add it to the timeline.
4. Edit the Text
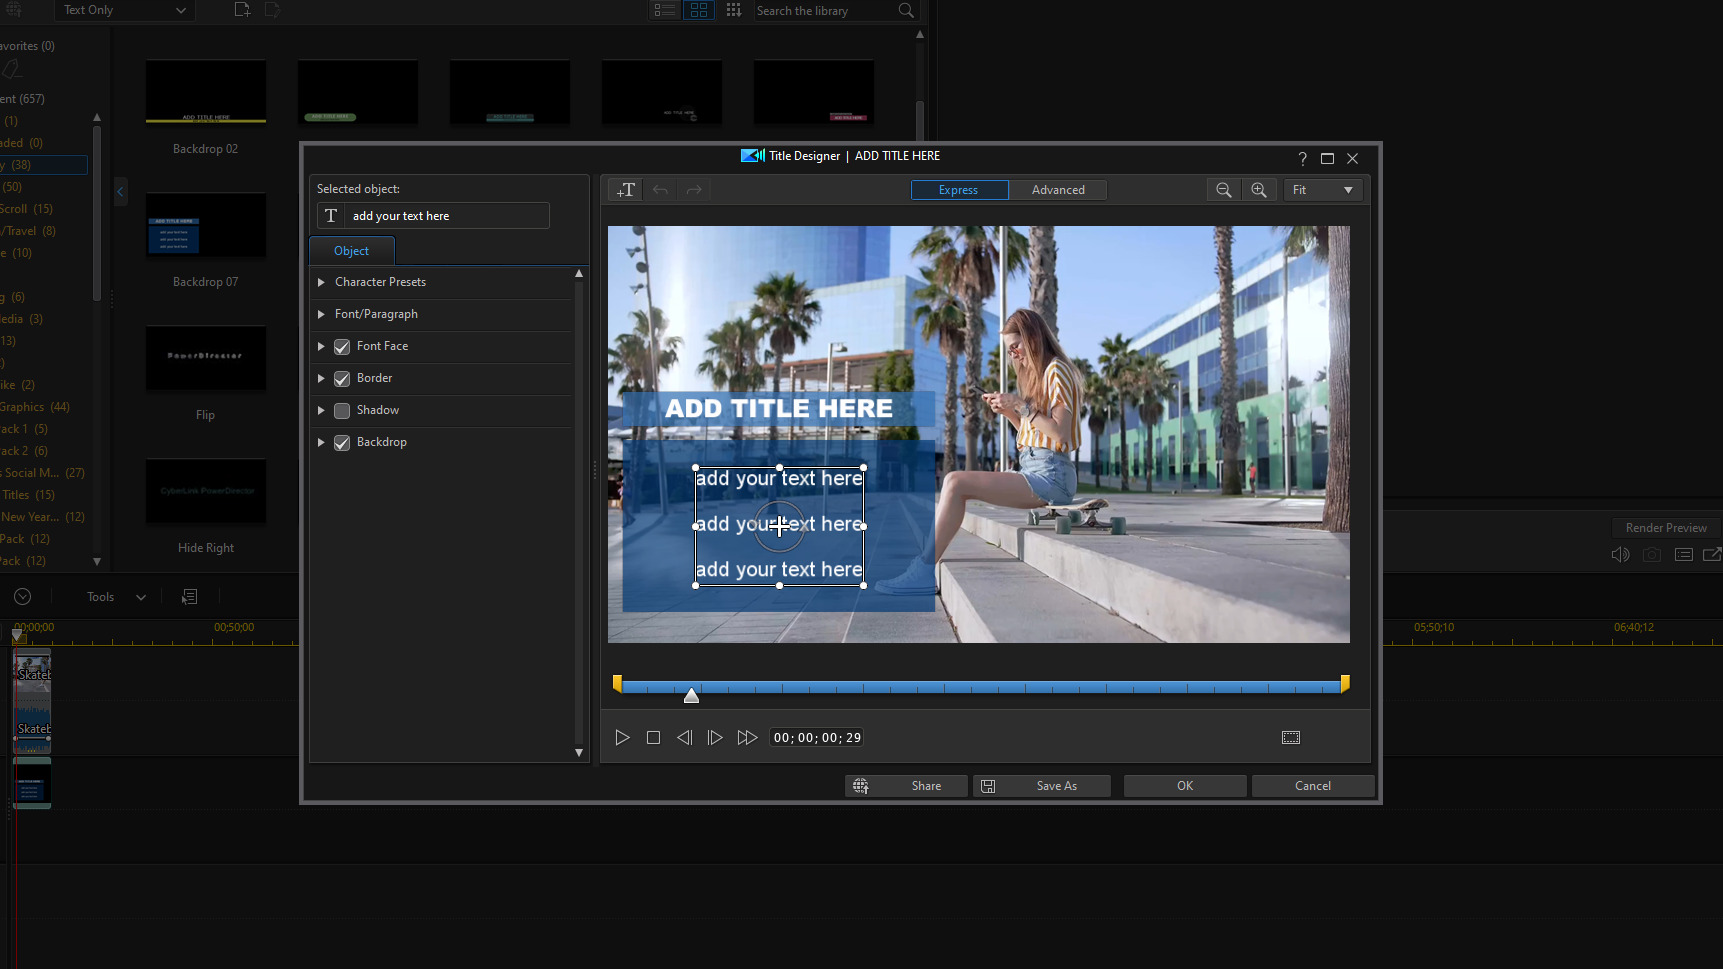
Double clicking a text template will open Title Designer which has a wide range of effects and editing tools you can use to adjust the text to your preference. Using these tools, you can:
- Change the words present in the text
- Adjust the font and size
- Move the text to a different position in the video
- Add a backdrop or highlight to the text
- Add motion
- Adjust the text's opacity and color
- Add a border
- And more!
Spend a few minutes adjusting the various text settings until you're happy with the final design.
5. Save Your Text as a Template
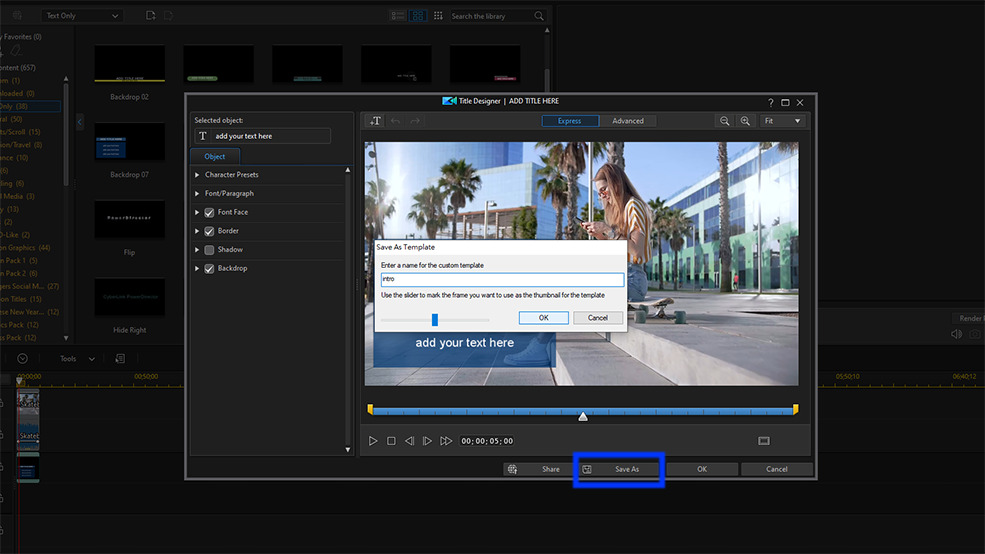
To ensure that you don't lose the adjustments you made to the default text, be sure to Save As in order to create a name for your custom template. When you click Ok your changes will be applied.
6. Ensure Text is Above Your Video Footage
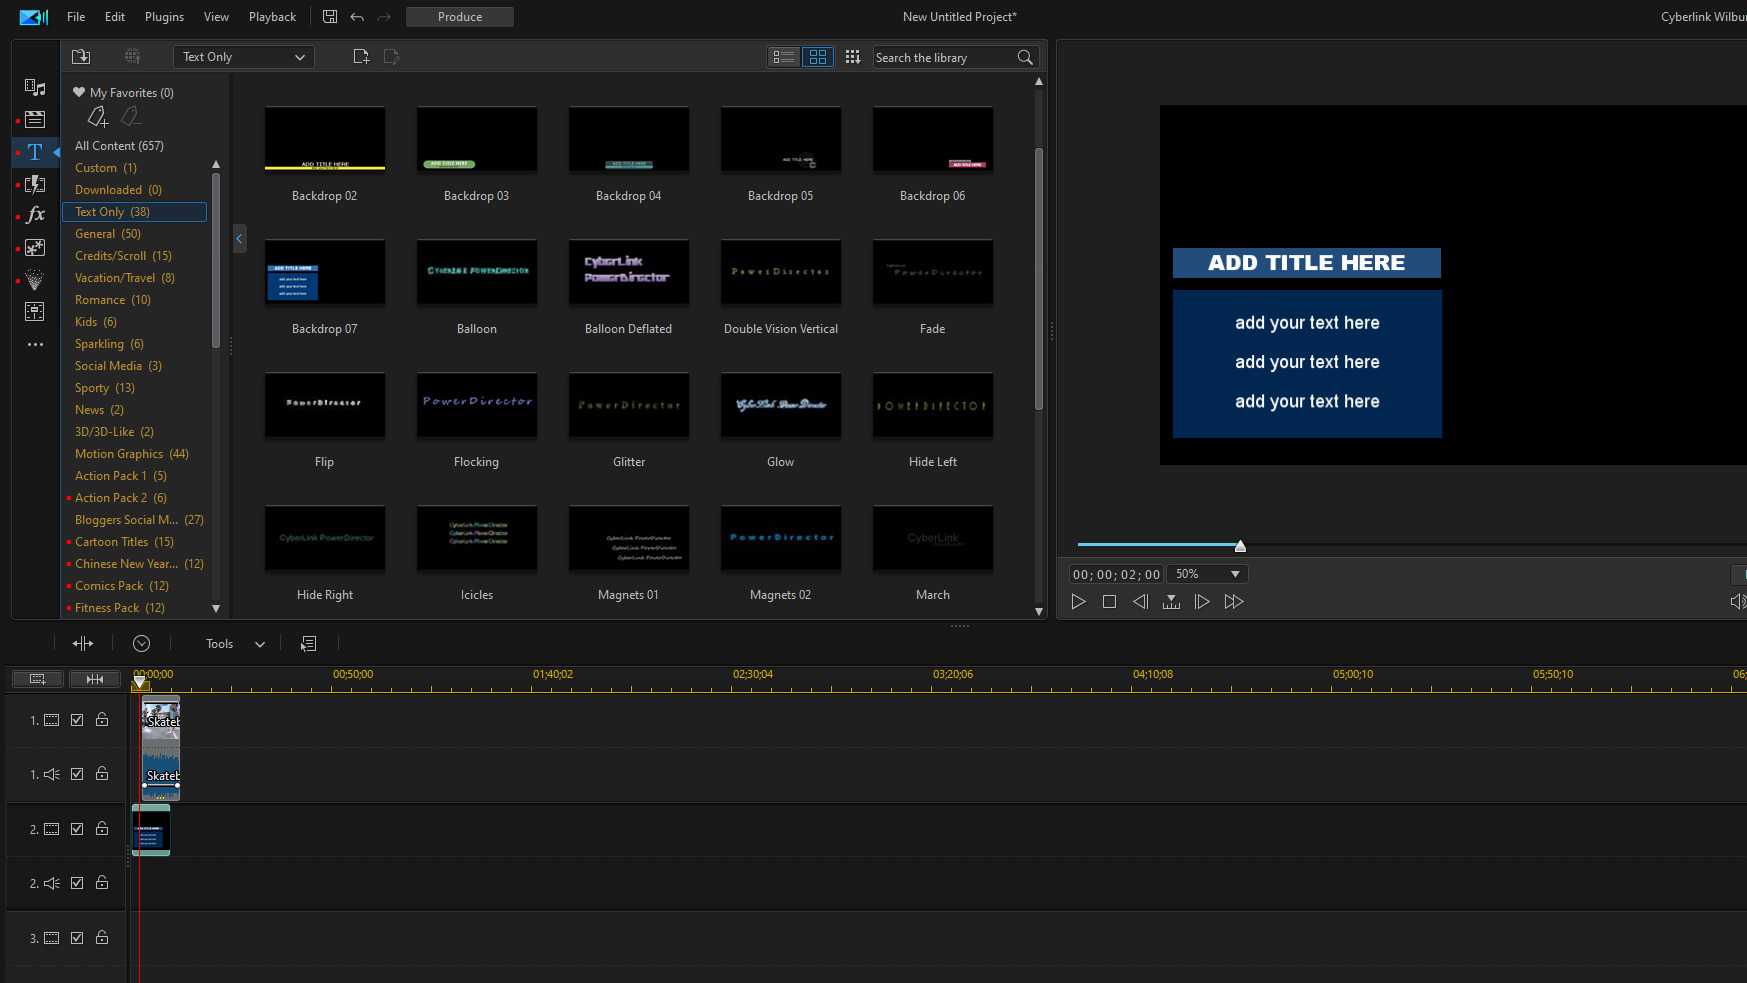
If you don't see your text in the preview window over your video it is most likely because it has been layered under your video. To fix this move the text under your video on the timeline. Then adjust the length to exact time in the video in which you would like the text to appear and disappear.
For example, if you want the text to appear before the video as a title, drag the text to the beginning of the timeline and adjust the video to begin a few seconds after the text.
7. Copy, Paste and Insert the Template Throughout Your Video
You can now add your template text throughout the video. Simply drag and drop it where you want and edit the text.

8. Export Your Video
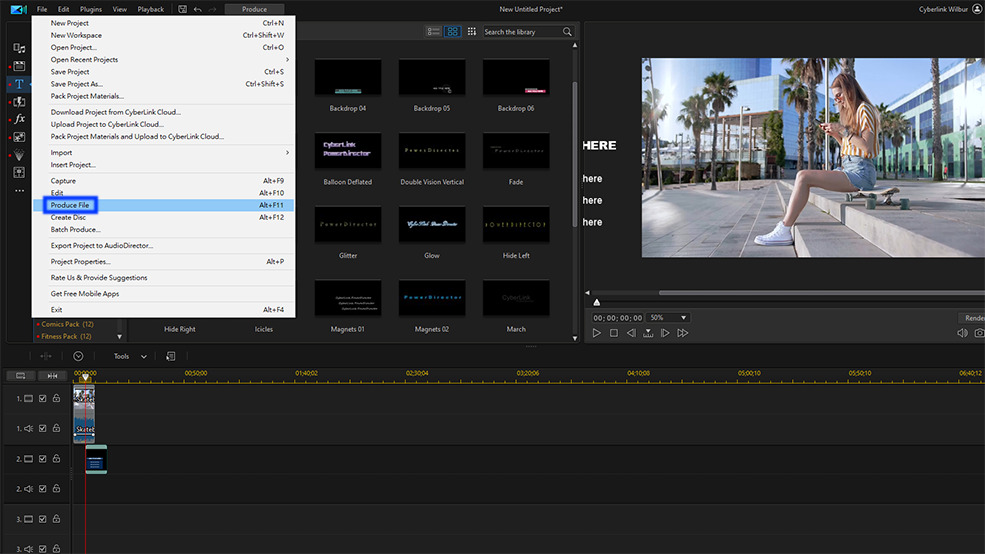
Once you're satisfied with the text placement and appearance, you can export your video footage via the Produce button.
Add Text to Your Videos Effortlessly
Adding text allows you to incorporate captions, titles, and end credits into your video footage with ease. PowerDirector streamlines the editing process by including built-in text templates and an easy-to-use Title Designer.
Download PowerDirector for Mac and Windows today and start creating professional-level videos.
Looking for another fun editing project to take on? Check out our tutorial on how to make a slideshow in Windows in three easy steps.


![Best Hairstyle Changer Apps to Try on Hairstyles for Free [2025]](https://dl-file.cyberlink.com/web/content/b2379/Thumbnail.jpg)

