
How to Turn a Photo into a Painting

PhotoDirector is a powerful, user-friendly editing program that includes a wide range of templates, effects, and tools that make it easy to elevate your photographs and impress your audience.
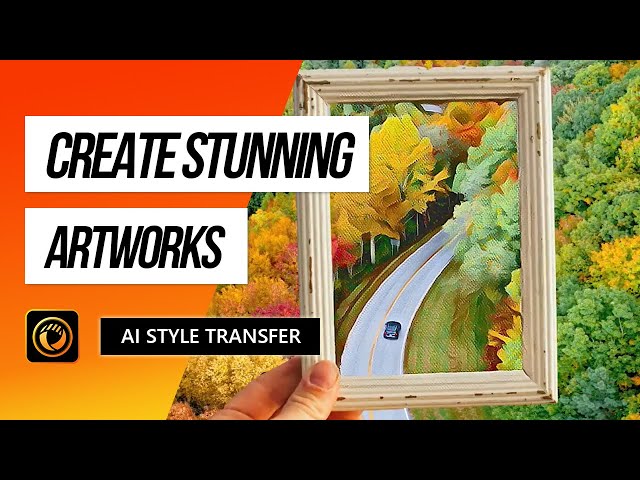
One of the software’s standout features is its AI Style Transfer tool which can automatically detect and apply preset style effects to any image. There are a variety of styles to choose from such as watercolors, sketches, or classic oil paintings that can make your photo look like it was painted by a master artist. In fact some styles even emulate famous masterpieces such as The Starry Night by Van Gogh.
Whether you are trying to create an eye-catching photo for your Instagram feed, a memorable picture to give to a family member, or a fun art project to kill some time, turning a scenic landscape photo into a painting is an excellent way to showcase your creativity and eye for photography.
Read on to learn a step-by-step tutorial for implementing this effect. Then download PhotoDirector today to try this effect yourself.

- Turn Your Photo into a Painting
- Import Your Primary Photo
- Import Another Photo of a Frame
- Select the Frame Photo, Then Click the “Effects” Icon
- Select “Background Removal” Under “Extract or Compose”
- Use the Selection Tool to Remove the Background and Inner Portion of the Frame Photo
- Resize the Frame Photo
- Select “Guided” at the Top Of the Page
- Click the “Photo Effects” Dropdown, Then Select “AI Style Transfer”
- Review Your Template Options & Apply the Template
- Erase the Effect Outside the Frame
- Export the Photo
- Final Thoughts
Turn Your Photo into a Painting
1. Import Your Primary Photo
Open the PhotoDirector program, click on the Library tab, and select Import.
Resize your photo at this time if you want to. Just click the Crop and Straighten icon in the toolbar, then change your aspect ratio. For reference, we cropped our photo to fit the 1 x 1 aspect ratio.
2. Import Another Photo of a Frame
To make your photo stand out as a painting, we recommend having a little fun and editing it to look like it is in a picture frame. You can find an image of a picture frame online or in the PhotoDirector stock library. We chose a photo of a person holding the frame in front of the camera to elevate the effect further.
Once you find a frame photo, import it to PhotoDirector.
3. Select the Frame Photo, Then Click the “Effects” Icon
Your next step will be to edit out the background and inner portion of the frame photo so that you can overlay it on the image you would like to turn into a painting.
Select the frame photo in your library, then click on the Effects icon in the toolbar. (This icon looks like a magic wand.)
4. Select “Background Removal” Under “Extract or Compose”
Once you click the Effects icon, a list of options will appear to the left of the toolbar.
Your next step is to select the Extract or Compose dropdown, then click Background Removal. This tool will cut out the background and middle section of the frame, turning it into a clean overlay to add to your photo painting.
5. Use the Selection Tool to Remove the Background and Inner Portion of the Frame
In some cases you will prefer to precisely control which parts you remove. Depending on your image, you can either select the frame and delete any other elements or select all elements except for the frame.
Clicking the Selection tool will turn your cursor into a brush that you can use to select items in your photo. Make sure to choose “Remove selected area” or “Remove unselected area” to correspond with your selection.
Once you finish removing the background and applying your changes, your painting photo should appear behind the frame photo.
6. Resize the Frame Photo
At this point, your cropped frame photo should appear as a floating object over your Primary photo. Your next step is to resize the frame photo or crop the Primary photo to ensure the portion you would like to turn into a painting is inside the frame.
We cropped our Primary photo so that some of the landscape is in the frame and some is outside.
7. Select “Guided” at the Top of the Page
Now that you are done cropping and resizing your photos, it’s time to apply the painting template. To access PhotoDirector’s built-in templates, select the Guided tab at the top of the page.
A pop-up will ask if you would like to save your changes in a temporary file for further editing. Select “Yes.”
8. Click the “Photo Effects” Dropdown, Then Select “AI Style Transfer”
On the Guided page, you will see a list of effects options. First, select Photo Effects, then find the AI Style Transfer tab. This tab will show you a list of built-in painting effects and styles that you can apply to your photo.
9. Review Your Template Options & Apply the Template
PhotoDirector includes a range of templates that respectively emulate watercolor, oil, or acrylic painting effects. A few of our favorites include “Abstract 3,” “Oil Canvas 1,” and “Watercolor.”
Spend a few minutes trying out some of these effects on your photo, then choose the one you would like to use to turn your photo into a painting.
10. Erase the Effect Outside the Frame
Your next step is to erase the effect outside the frame so that only the portion of the photo inside the frame looks like a painting.
With the effect selected, scroll down to the bottom of the AI Style Transfer Window. Next, choose a brush and erase the effect outside of the frame. Alternatively, you can erase the effect inside the frame and invert the effect.
In our example, erasing the painting effect from the portion outside the frame revealed a unique and inspiring work of art, all done in a few minutes.
11. Export the Photo
Now that your photo to painting transformation is complete, all left to do is to export it in your preferred file type so you can share your masterpiece.
Final Thoughts
PhotoDirector allows you to apply dozens of impressive digital paint effects that will instantly elevate your photos. Use this tutorial and their AI Style tools to make you look like a photo-editing expert, regardless of your previous editing experience.
Download PhotoDirector today to begin trying these professional, user-friendly editing effects for yourself.


