Color inversion effects replace the colors in your photos with their complementary versions — red with green, blue with orange, yellow with purple, and green with magenta. In black and white photos or a grayscale image, inverting makes dark areas light and light areas dark. You can easily apply these effects using a photo editing software on your Windows or Mac computer.
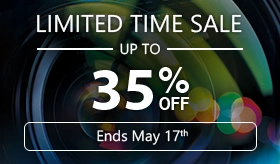
This guide will teach you to invert the colors of a picture using PhotoDirector, the best photo editing software you can download for free.
PhotoDirector is the best software to invert image colors because of its color curves tool. While most color inverter software limits your control over the effect, PhotoDirector’s color curves give you complete control over your inversions. You have the flexibility to invert all colors or to invert reds, greens, and blues separately. Thanks to this precise control, you can create wholly unique-looking images.
Download the free photo editor to try your hand at creating strange and uncanny images.
Download from the App Store for iOS
and Android
.
How to Invert Colors on Windows and Mac
After you have downloaded and installed PhotoDirector, follow these steps to invert your image’s colors:
Open the image you would like to edit into PhotoDirector.
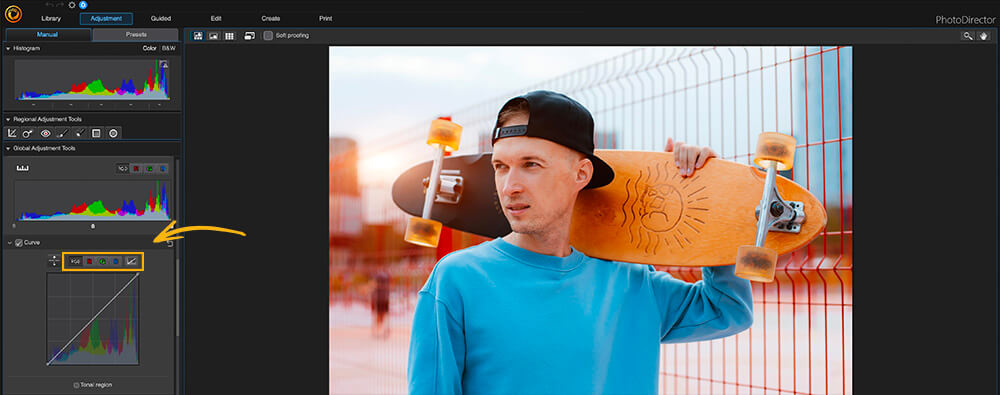
Open the Adjustment tab.
Select the Curve dropdown in the left-hand panel.
A box will open beneath the dropdown menu indicating the RGB values in your image. You’ll see a diagonal line that spans from the bottom left to the top right of the box. This line is draggable — you can try adjusting its positioning and see how the colors in your image change. Returning it to its original position will revert your colors.
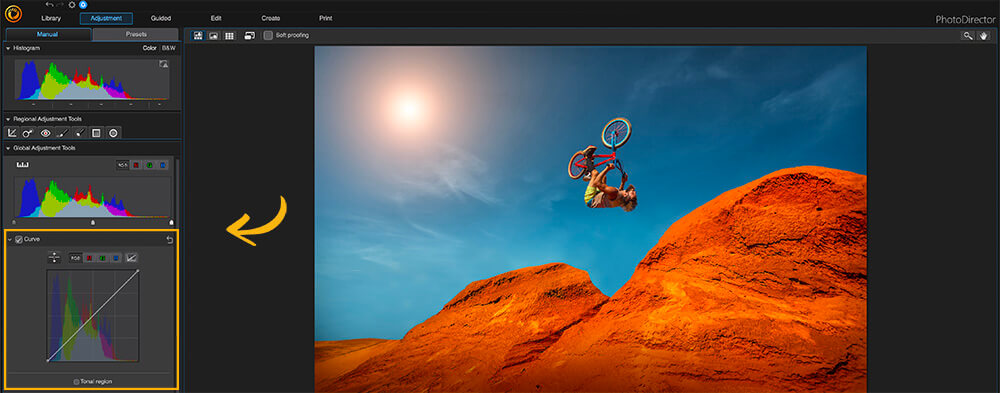
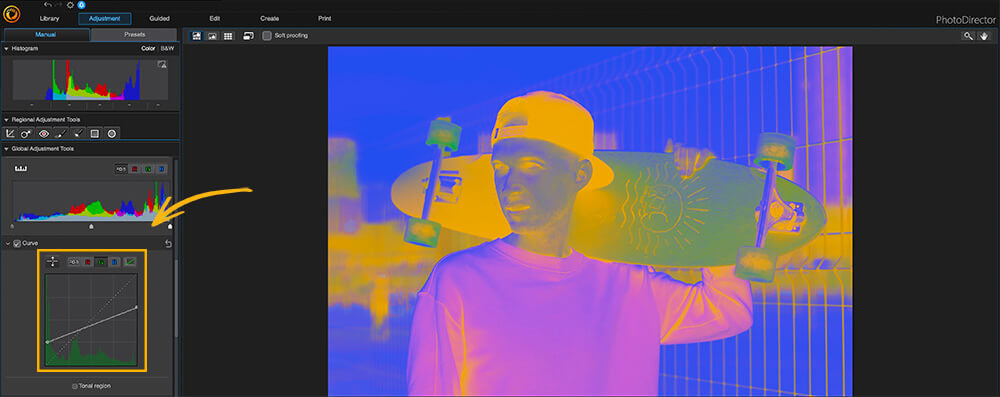
To invert your colors, you’ll need to drag the diagonal line to its inverse position. You can do so by dragging the bottom-left point of the line to the top-left corner of the box. Then, drag the top-right point of the line to the bottom-right corner of the box.
You’ll notice that this adjustment replaces the original colors in your photo with their complementary versions. For example, the vibrant orange hues in the image above are now vibrant blue. Likewise, the rich blue shades of the skies are now light orange.
Once you are satisfied with the colors in your image, you can save your changes. Click the File dropdown, then click Save as.
How to Customize Your Color Inversions on Windows and Mac
With PhotoDirector, you can change each specific color channel — red (R), green (G), and blue (B) — individually. You altered all of these channels at once in the previous step, applying uniform changes to each color. Adjusting the tones individually can allow you to brighten specific tones and create a more abstract appearance in your image.
You can follow these steps to customize your color inversions within your RGB channels:
Upload your photo, navigate to Adjustment, and select the Curve dropdown.
Above the box graph, you will see R, G, and B buttons. These buttons stand for Red, Green, and Blue.
Click the R button, then drag the curve line to see how the red hues in your photo change.
Tip: You can always click the icon above the top-right corner of the graph to reset the curve to its default position.
Drag the left-hand point of the line to the top-left corner and the right-hand point of the line to the bottom-right corner. Doing so will invert the red values in your photo.
Now, select the G button to begin adjusting the green values in the image. Watch how the image’s colors change when you apply green tonal adjustments on top of red ones.
Finally, select the B button and adjust the blue tones in your photo.
We recommend playing around with inverting the red, green, and blue hues. Get creative and see what kinds of cool effects you can create by adjusting the curve.
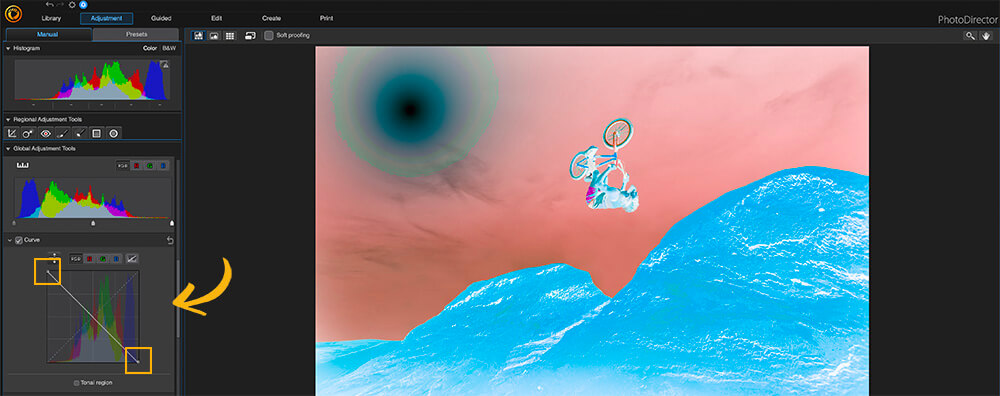
Once you are happy with the colors in your image, you can save your changes and download the image. If desired, you can save several image copies with different tonal adjustments.
Tip: Select the Tonal region checkbox below the graph to limit the range of tones your changes affect. Once you select this checkbox, you can drag the sliders below the box to make the following adjustments:
Highlights: Adjusts the brightest areas of the photo that may appear overexposed after applying color and tonal changes
Lights: Adjusts the upper-middle portion of the color curve to alter the lightest pixels in the image
Darks: Adjusts the bottom-middle part of the curve to modify the tones of the darker pixels in the picture.
Shadows: Adjusts the underexposed areas of the photo by lightening the shadows.
PhotoDirector’s color curves tool gives you complete control over the hues in your photo, allowing you to make as simple or extreme adjustments as you’d like.
If you’d like to apply color adjustments beyond the color curve tool, we recommend trying out the HSL/Color features. This tab appears directly below the Curve dropdown and allows you to fine-tune the shades in your photo.
In the HSL/Color section, you can adjust the following metrics:
Hue: Clicking the Hue button allows you to adjust the shade or purity of each color in the photo.
Saturation: Clicking the Saturation button allows you to adjust the intensity of the color within the image.
Lightness: Clicking the Lightness button enables you to adjust the brightness of each color in the image.
You can make each of these adjustments by dragging sliders for the red, orange, yellow, green, blue, purple, and magenta tones in the photo.
Tip: If you are editing a black and white photo, the HSL/Color section will appear as Black and White.
Best Color Inverter Software [Free Download]
Inverting photos is a great way to add visual appeal to any image and give it an otherworldly look. However, if you've never used a color inverter software before, you may feel intimidated by the thought of navigating this type of program for the first time.
Thankfully, you don’t need to buy expensive, hard-to-learn software like Adobe Photoshop. PhotoDirector makes it easy to apply color inversion adjustments to your photos, even if you're a complete beginner. The program's color curves tool lets you make professional-level tonal adjustments to your images by dragging the curve to your desired position.
Now that you know how to invert colors using PhotoDirector, you can begin applying this effect for yourself. If you haven't already, download PhotoDirector for free today to access the program's full range of effects and features.
Download from the App Store for iOS
and Android
.
Color Inversion FAQ
Color inversion is the process of altering the colors in an image to their opposite or complementary versions.
This technique originated with film photography, as photographers would first create “negatives” of images, which used the opposite colors and tones of the original subject. Then, to develop their photos, they would use a process that replaced those colors with their inverse hues, reverting the image to its original coloration.
While film photographers still use the film negative process to develop film today, color inversion is also a popular effect to add to digital photography. The effect gives images an intriguing, visually appealing quality that catches viewers’ attention.
A negative photo effect is an effect that inverts the colors in images like you would see when developing negative photos in film photography.
You may have seen how photos look before developing them if you've ever used a film camera. The areas of the picture that you would expect to be light are dark, and the dark areas are light. This film "negative" is essentially the inverse of the final photo. To develop the photo, you would use a process that reverses these colors and tones.
"Color inversion" and "negative" effects are typically interchangeable terms. These effects swap the colors in a photo with their complementary shades.