What is Keyframe Animation and 10 Ways to Use it Creatively
One of the simplest secrets to making movie magic is the keyframe. It’s a fundamental element of creating animations, effects, and motion graphics. If there is an animated object in a video, it is being control by keyframes.
Read on to learn what keyframes are and 10 of the most popular effects you can create with them.
- What is a Keyframe?
- What is Keyframe Animation?
- Slow Zoom
- Fast Zoom
- Tracking Motion
- Rotation
- Title Zoom
- Text Pop
- Title Reveal Mask
- Moving Lens Flare
- Animated Light Rays
- Mask An Object With PowerDirector
- Create Your own Keyframe Animations
What is a Keyframe?
A keyframe is a point (one frame) on a video timeline where you tell the video editing software a specific properties settings. Some common properties are scale, rotation, opacity and volume.
What is Keyframe Animation?
A keyframe animation is the shift in a property setting in between two keyframes. The idea is to trigger a change to your video that takes place over a certain set of time.
That change could be a change in magnification or scale (zoom in or out), a change to the framing (moving the image within the frame), rotating the image, a change in the color of the image, fading in or fading out, or a change to the audio.
Almost any parameter that you can set within the timeline can be animated using keyframes.
For this article we are going to use the free video editor PowerDirector and color grading software ColorDirector for some of our examples. If you already have a video software you should be able to apply the principles we go over in your video editors. If you need a video editing or yours doesn’t have a feature mentioned in this article you can download PowerDirector and ColorDirector for free.
Both are available in Director Suite 365 that also includes PhotoDirector and AudioDirector.


Now let's dive into some of the most common keyframe effects.
1. Slow Zoom
This is one keyframe animation video editors use a lot, and it’s very simple to create. First, choose a spot on your timeline where you want the zoom to begin. Using the keyframe tool for scale, set a keyframe at that spot. Now, move forward in the timeline and set a second keyframe where you want the zoom to end. With that second keyframe selected, set the scale you want for the end of the zoom and move the resulting image within the frame to get the cropping you want. That’s it.
Since a slow zoom is just that, slow, you’ll want to space those two keyframes appropriately. My rule of thumb is a 10% change per second. So, if you want to start your zoom with the scale at 1.0 (100%, same size as it was shot) and end it at 1.5 (150%) scale, place the second keyframe at least five seconds ahead on the timeline. Once you see how that looks, you can reposition the final keyframe or change its magnification level to make it more pleasing.
2. Fast Zoom
A fast zoom is done exactly the same way as a slow zoom, but the keyframes are much closer together on the timeline, perhaps within a half-second to a second. Place your keyframes, choose your final magnification and then play it back to see if you like it.
3. Tracking Motion
Using PowerDirector’s motion tracking tool is just as simple as making a keyframe animation. First, add a clip to the timeline and select it by clicking on it. Look just above the timeline. Click and hold on the “Tools” menu. The popup menu gives you several tools to choose from. Select “Motion Tracker.” The motion tracker panel will pop up. It contains controls for the motion tracker and a viewer for the video clip you selected.
Underneath the viewer, click “Add a tracker.” The tracker, a rectangular box with handles, will appear on your video. Use the handles to resize the tracker box to fit the object you want to track fairly tightly. Now push the “Track” button to the left of the timeline in the motion tracker viewer panel. The video clip will roll and your box will now follow the object you selected. If the box is not following the object closely, try making the box smaller, cropping in on a small area of the subject or a splash of a bright color.
Now you can use the tracker to add a title, a video clip or image, or an effect (like blur, mosaic, or spotlight) to the tracker box. Your title or effect will follow the object you tracked. It does this because keyframes are automatically created when you track and applied when you click “Ok.” Double click on the newly added tracked object on your timeline to open up Title or PiP Designer to see the scale and position keyframes that were created.
4. Rotation
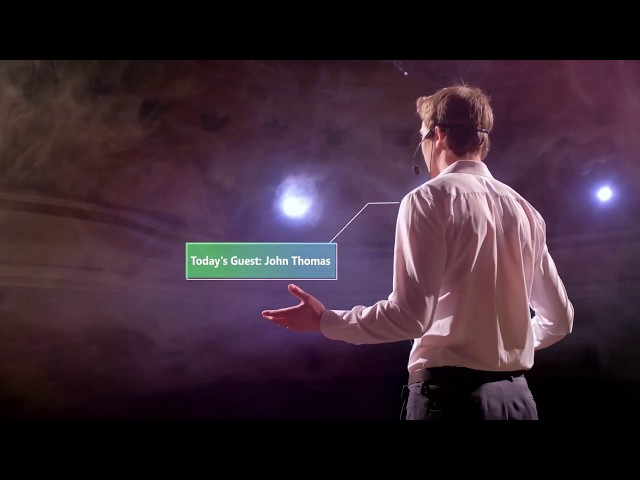
Using keyframes, you can also rotate your video image, either the main image or another video clip, graphic, or text on top of the main image. Place the object to be rotated on the timeline. Double click on the timeline of the object you want to rotate to bring up the PiP Designer panel.
In the dialog panel, scroll down to the Rotation section. The clip now has crosshairs in the center of a white circle. Note the arrows on the white circle. Grab a point on this circle and slide your mouse left and right. The object should rotate as you move the mouse.
Set the object to its initial position and click the diamond icon to set a keyframe at that point in the timeline. Now move ahead to the spot where the rotation will end. Rotate the object to the orientation you want and set a second keyframe. Now play it back; the object should rotate smoothly.
You can refine the rotation by adding or subtracting 1/100th degree increments in the numeric dialog of the rotation section of the PiP Designer panel.
Your object is going to rotate around the crosshairs in the circle, which is the center of the object. However, you can set the center of rotation anywhere. Just below the rotation controls in the dialog box is another section called “Anchor Point.” This sets the center of rotation. Setting the X (left-right) axis to 1.0 moves the center of rotation to the right edge while -1.0 sets it to the left edge. Setting the Y (up-down) axis to 1.0 moves the rotation point to the bottom edge, while -1.0 sets it to the top edge. For example, if you had a label that you wanted to have swing back and forth from its upper right corner, you’d set the rotation anchor point to X=1.0 and Y=-1.0.
5. Title Zoom
This is one of the most basic and simplest keyframe animations. It works exactly like the image zooms above, except instead of scaling the image up or down, you’re scaling a title up or down.
Set up a title by selecting one in the Title Room and dragging it onto your timeline. Now double click the title on the timeline, which will open the Title Designer dialog panel. Look up to the top of the panel and select “Advanced.” This will make more settings available.
Scroll down to Object Settings. In this panel, you can control the scale (magnification), position, opacity, and rotation of the title.
To zoom in, choose the point on the timeline where you want the title to begin zooming. This is easier if you trim the title on the timeline to the area where you want it to be visible. At the beginning point of the zoom, click on the keyframe icon to add a keyframe and set the scale you want to begin with. You can use the handles around the title to shrink/enlarge it, but when shrinking, you can’t set the scale to less than .4 this way. Using the dialog box or the scale sliders will let you set it to its minimum, which is .2.
Now advance the playhead to the spot where you want the zoom to end. Set another keyframe here. Now, using the handles, dialog box, or sliders, increase the size. The maximum is 10.
6. Text Pop
Instead of slowly revealing the text using scale, you can pop it in. You can use keyframes to do this, but the simplest way is to add your title to the timeline, size it as you wish, then trim the title on the timeline to the exact spot you want it to appear and disappear. In the space of one frame (1/30th or 1/24th of a second), the title appears out of nowhere, looking like a “pop.”
7. Title Reveal Mask
What if you want the title to move in from a location on the screen? You can do that using a Title Reveal Mask. It's one of the options in your Title Designer menu. Set up your clip and a title as above, then double click on the title track in the timeline to bring up the Title Designer Menu, then scroll down to Title Reveal Mask.
Click the check box next to Title Reveal Mask at the top of the section. This will add a mask to your video. The mask will be outlined by a thin dotted line and will have handles you can use to size and position the mask.
Now position the mask over the title where it will appear once it has finished moving on screen. Resize the mask to be just a bit larger than the title.
Scroll to “Object Settings” > “Position” and move the title outside of the masked area. This will "hide" the title. Set a keyframe for the new position of the title.
Move the playhead to the spot in the timeline where you want the title to come to rest after it is revealed. Set a keyframe for the title at that point on the timeline and move the title into position. Now, the title will move from the "hidden" area into the visible area and be revealed when the clip plays.
8. Moving Lens Flare
Adding a lens flare to your video can be dramatic, and it’s even more eye-catching if the lens flare moves as you pan the camera or follow your subject.

To create this effect, open your video clip in ColorDirector. Click on the Effect tab at the top of the screen. Choose the Light Effects section. Under Light Effects, choose the Lens Flare section. In this dialog, you can pick the type of lens fare you want, its size, brightness, how it blends with the background, position, and more.
Just below the Adjustment tab at the top of the screen is a clock icon. This is the keyframe editor for ColorDirector. Click to open and a mini timeline will appear, with options to set keyframes for each of the parameters.
Go to the beginning of the clip and set the size of the lens flare to zero. Then advance the timeline a second or two and set the size of the lens flare to a larger number, like 35. Now the lens flare will start out invisible, but will “grow” in.
Advance the timeline playhead by five to eight seconds, and drop down to the X position and Y position sliders. Move those sliders to the right. This will cause the lens flare to move to the right and down as the timeline plays.
Experiment with changing the other parameters to see how they change the lens flare.
9. Animated Light Rays
To create animated light rays — streaks of light that move across the image — open a clip in ColorDirector as above and choose Effects > Light Effects > Single Source Light Rays.
Set the intensity of the rays, the length of the rays, the softness (set to zero when you’re building this effect so you can see the rays) and the threshold. As above, click on the keyframe icon (clock) just below the Adjustment tab at the top of the screen. This will open the keyframe timeline. If you want to start your clip without any rays, just dial the intensity back to zero. Then move forward a few seconds and increase the intensity. ColorDirector will set a keyframe and the intensity of the rays will increase as the playhead moves toward that keyframe.
To move the rays across the image, grab the small sunburst showing on the viewer image. That’s the point from which the rays are emanating. If you move that sunburst to another part of the image, the rays follow and ColorDirector will set a keyframe at the new location. For practice, try starting the clip with the rays at the far left side of the clip, then moving all the way across the frame to the right edge. When you play back, the rays will move across the frame from left to right.

10. Mask An Object With PowerDirector
There are many reasons you might want to use masks when making videos. Masking an object allows you to cut it or the things around it out of your video. This allows you to combine videos together in a technique called compositing. There really is no end to the creative possibilities of compositing.
Masks are useful but their true power is only realized when incorporated with keyframes so they can move and adjust throughout a clip. Without keyframes, a mask would be static and not very helpful when working with footage with a moving camera or objects.
To create a mask, double click on the clip you want to mask to select it, then go just above the timeline to “Tools.” From the pop-up list, choose “Mask Designer.” Now you’ll get a pop-up panel containing a viewer and a number of controls. You can make a mask from one of the pre-programmed shapes, or you can build your own. If you build your own, you can do it with text (so that an image appears inside of the text), with the selection brush or with the polygon selection tool.
Of these, the mask selection tool is the most precise. To use it, click on its tile in the control panel. Now, a point will appear wherever you click within the image. Move the mouse and select a second point and a blue line connecting the two points will appear; this is the boundary of the mask. Keep clicking until you’ve outlined the object you want to mask. The last point you click should be on top of the first one; that will complete the border selection. You can refine the mask by feathering it — fading the transition between the border of the mask and the rest of your image.
Note that, once you complete a selection, PowerDirector places a keyframe icon (diamond) on the mini-timeline in the Mask Designer panel. That shows where your mask will appear. Pressing the diamond to the left of the timeline will add more keyframes. Now you can apply effects or parameters to the mask, and they’ll fade in or out as the playhead moves between the keyframes.
Experiment with subject matter and effects. Shoot a closeup of eyes, then replace the pupils with an unnatural glowing red color. As your subject moves, use the keyframes to move the mask in sync with the subject.
Mask An Object With ColorDirector
ColorDirector also lets you mask objects for regional color correction and grading or creating a green screen to remove sections of footage with chroma key. There are 4 masks types to choose from: Selection, Brush, Gradient, and Radial. All of these masks can be controlled with keyframes but the Brush Mask has tracking. This means you can highlight an object and have ColorDirector track its movement through your video.
Once you have tracked your object you can go back and refine your mask with keyframes. This is definitely one of the most straightforward and easiest tools for creating masking available. The best part of the brush mask is being able to turn on the “Green/Blue Screen Maker” and instantly add a green screen to your video.

Vertigo Effect
Named for the Alfred Hitchcock film in which it first appeared, this effect is done by combining a dolly shot (moving the camera forward or backward smoothly) with a zoom. The dolly shot can be created using an actual dolly, or you can use a drone, a wheelbarrow, a lawnmower — anything with wheels that you can mount a camera on that can be moved. Here’s what it looks like:

First, create your dolly shot. In PowerDirector’s, combine that with a keyframed zoom of the image. If your dolly shot is toward the subject, zoom out ( that is, reduce the scale of the image during the clip). If your dolly shot moves away from the subject, zoom in (increase the scale of the image). The opposing motions of the subject and the background are visually disorienting and can be quite striking.
Create Your Own Keyframe Animations
Keyframe animations are an easy way to add interest to your videos. They’re simple to do and can add a bit of big-budget glitz to whatever you’re producing.
Download PowerDirector and ColorDirector to try out the techniques you learned in this article.
Both are available in Director Suite 365 which is a complete editing studio for video, photo and audio.


If you're an aspiring editor looking to create cool videos, head on over to our complete guide on video editing effects. We've also got other great articles in our blog that'll introduce you to all the tools you need to enhance your portfolio.

